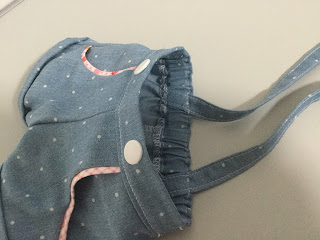
Bias binding is easy and versatile
It can be used on both casual and dressy garments
There are several ways to apply the binding
Since starting to sew doll clothes I have become almost obsessed with using bias binding to neaten the necks and armholes of dresses and tops, creating a neat gathered edge on necks and pockets and purses and even creating a decorative hem edge on skirts and dresses. It is just so easy to add to almost any garment.
Whether the dress is a vintage beauty or a weekend play dress using bias binding in matching or contrast colours provides a perfect feature or neat finish. Cutting stripes or checks on the bias looks fabulous.
There are at least 3 different ways to apply the binding and each has its virtues. They are interchangeable but speed and ease will play a part in your choice of method.
What is Bias Binding?
Bias binding is made from a folded strip of fabric cut on the bias or cross grain of woven fabric. When cut like this it is quite stretchy and works like ribbing on a knit garment. It is usually creased along the centre lengthwise then the raw edges are folded to the centre. When it is folded again the raw edges are enclosed. Its stretchiness makes it perfect for binding along curves like necklines and armholes.
How can it be applied?
Method 1
The quickest way to apply the binding to an edge is to fold a flat strip in half once. Use a strip about 1" wide.
With right sides together, line up the raw edges with the raw edge you are binding and stitch it in place. Press the binding away from the garment and seam towards the garment.
Top stitch along the right side so the seam is held in place on the wrong side.
The decorative bias strip on these pockets is perfect for this method.
Method 2
The second method is a bit neater but requires a bit more fiddling to create the bound edge. Use a strip 1 1/4" wide.
Open out the binding strip and place it right side down along the wrong side of the edge to be bound. Stitch it in place. Trim the seam.
Press the binding up over the seam allowance. Fold in the raw edge of the binding and then fold the binding over the seam allowance.
Stitch it in place close to the fold.
Method 3
This method is both easy and quick.
Using a 1 1/4" strip fold it in half then stitch it in place to the wrong side of the edge to be bound. Trim the seam allowance.
Bring the folded edge of the binding all the way to the right side so it shows only on the right side and stitch it down close to the fold.
Making continuous bias binding
I have always wanted to make bias binding this way but I have never needed more than short strips. Have you tried making bias strips like this. See what I mean on the blog called Reconstructing History
Different ways to finish necks and armholes
Are you looking for a variety of ways to neaten necks and armholes on your doll clothes?
Get full instructions and different patterns to use for practising different ways to finish necks and armholes in the Finishing Necks and Arm Holes series of Applied Doll Dressmaking by Val Spiers Sews.


