I love sewing 18" doll clothes. It seemed a natural progression to start designing them too. You can read all about my life journey on valspiers.substack.com
I finished off the samples for this design today. I still have a few bit to do on the instructions but it will be published to my newsletter Sunday 25th may 2024.
Perfect for checks or stripes this top and shorts is the perfect summer outfit. Dress it up with sandals or just be ready to play on the sand with bare feet.
This outfit is both quick and easy to make.
My trademark style is easy and pretty and this one is a perfect fit. I love designing clothes that look like people clothes but are made especially to suit the dolls.
You can enjoy this pattern free to download when you subscribe to my Substack lifestyle newsletter. Every 4th Sunday of the month I write about my sewing hobbies and doll clothes pattern business. To promote my business I include patterns for the dolls for my paid subscribers. The 25th May I am including this summer set for free.
I am also working on another outfit to go below the paywall so those who have taken advantage of my paid newsletter will not be missing out.
Think of the paid newsletter as a monthly pattern subscription. Many of the patterns this year will be exclusive to the paid newsletter. The 3 weeks leading up to the dolls clothes pattern will include stories about my other interests and how I am leading a fulfilling and joyful life. I also include worksheets and information pdfs and planning pages to make it easy for you to create your own joyful life.
If you are interested in creating the life that you always dreamed of but don't know where to start you will find lots of examples of how I use all those confusing planning and mindful strategies along with worksheets and lists to get you started. The downloads will help you to customise the strategies to suit your needs.
Make sure you subscribe for free today. You can upgrade to paid any time and get access to the complete archive of newsletters and downloads.
There are so many different variations of knit fabrics.
It's difficult to make a design that will suit a range of knits. If you don't have the right knit the pattern doesn't work the way it's supposed to.
I stumbled across this cute sweater with a stuck on bow that I just had to try to replicate for the doll.
It's from Shein. I found it on Pinterest.
I have a lot of fun trying to make a design suitable for an 18" doll to wear. I think the one I designed for my doll looks better than the people one.
I had several knit fabrics and I wanted to try them all with this design. The white one is t-shirt knit. A nice medium weight, not too flimsy.
The pink velour one is not very stretchy so I had to adjust the cuffs and the waist band to make the strip a bit longer. After making one I decided the waist band needed to be wider to look more in proportion with the thicker knit.
I also realised that I would have to make the cuff strip the same width as the wrist edge of the sleeve so it would go over the hand.
I tried a lycra one but it was just too thin and didn't look any good with the bow.
Use a stretchiness guide
Eventually I decided I needed a knit stretchiness guide so you would be able to choose the right pattern pieces for your knit. I wanted the pattern to work with more types of knits than t-shirt knit because the pretty knits I had were all over the place. You can just use a ruler but including the guide means you don't need to search for a ruler.
An easy to sew neck band
I called this design easy because the neckband fits perfectly and doesn't cause any trouble when you stretch it out to sew on.
The method I use is perfect for those times when you don't want to use ribbing or you just don't have matching ribbing. It works for all stretchiness types of knits as long as they are not ribbing.
I had a bit of trouble folding the neckband over the seam allowance with this knit. In hind sight I should have trimmed off a bit of the seam allowance across the centre front where the front panel sits.
I had to go over a bit of edge where my stitching missed. When you top stitch from the right side you can't see exactly what is going on behind.
I also decided not to trim any of the neck band after top stitching because this knit seems to unravel a bit when cut on the straight edge. I don't think it will make the garment any less hardy but it does look a bit messy on the band seams.
Finishing the seams
In the past when I sewed knits I would open the seam at the wrist and stitch it flat. I am over that now. I don't think it really makes any difference to the look on the doll. I guess it looks a bit clunky on the inside of the sleeve but I don't worry too much about staring at the insides of my garments. If you make knit tops to sell your customer would have to be pretty finicky to complain about neatness or not on the inside. As long as it is finished as best as you can.
I have even stopped overlocking my seems because it add bulk and stiffness to a garment that spoils the look.
The narrow zig zag!
The other thing I always do when I sew knits is to use a very narrow zig zag stitch for all the seams and top stitching.
My 1/4" foot has a hole in it for the needle to go through and when I set my zig zag to 1mm I find that the needle still goes through the hole so I don't have to change feet.
I have also found that using the zig zag means I don't have to change to a special knits needle. I always use my regular needle for knits. The only time I might have trouble is with the very stretch lycra style knits. The ones that stretch in every direction.
The narrow zig zag allows the garment to stretch without breaking the threads.
I don't think it would allow enough stretch for the really stretchy fabrics. Dolls don't tend to put a lot of stress on their clothes though so it may be OK.
The Published Pattern
The Faux Bow Sweater is good for both Our Generation dolls and American Girl dolls.
I published this one in February 2023.
VIP ladies will find it in the VIP Dropbox folder.
Everyone else can find it in my shop. Each time I publish a new pattern I put it on sale for that month so always check out the sale section in my shop.
Don't forget you can get 20% off with the code SAVE2020 if you put $20 or more Australian dollars in your cart. The $20 total is before tax.
This knit tunic is a great design to quickly add something cute to your doll's wardrobe.
My fabric choice is a knit with an all over small design of Christmas cookies.
I bought this from Spoonflower. There are so many gorgeous prints to choose from and even at full price it is good value to get a pattern that is not in the regular shops.
I chose the cotton knit which is so soft and light. Perfect for doll clothes. It is a regular knit with knit and pearl sides but because it is so soft it doesn't curl at the cut edges enough to cause a problem.
I wanted to do a ribbing neck band so I cut myself a piece of ribbing 1 1/2" wide and 3/4 the length of the neckline. About 6 3/4".
I checked that my ribbing would comfortably stretch to the full 9" before cutting it. Not all ribbings are the same.
To sew it on fold it in half and put a pin at the centre. Find the centre of the neck on the dress and pin the band and the dress right sides together matching the centres.
You need to sew on the neck band after you do the shoulder seams of the bodice
Pin the band to the back edges then stretch out the band and pin it at the quarter position on the neck edge. You may need to pin at the eighth position too.
Lightly press the band away from the bodice so the seam allowance points down.
Top stitch close to the seam line on the right side so you sew the seam allowance to the bodice.
No need to overlock seam edges.
I did use a narrow zig zag stitch and an ordinary needle for this knit.
I sewed the back facings down with a straight stitch.
I added a head band using a scrap piece. It measures 3" x 12"
I sewed the seam with the strip right sides together then I turned it.
I centred the seam then stitched the back seam.
Back
Front
I made up the leggings with the ribbing. I probably could have taken a 1/2" or so out of the middle of the pattern piece since my ribbing is very stretchy.
Add some boots and she is ready to go.
I am a bit of a tea fanatic so I treated myself to this beautiful tea box from The Tea Centre.
I had some birthday money to spend. You can probably notice that I am a bit of a coffee fiend too.
If you want to make a knit tunic for your doll I used this pattern
This blog post is all about how to sew the paper bag shorts design. If you have a basic pattern for pull-on pants or the 1813 Gathered Pull-ons from my Etsy shop then you can follow the steps in my You Tube video on how to hack your basic pattern to create the paper bag shorts pattern.
Show and Tell
I love looking through Pinterest for different fashion ideas for basic designs.
I saw these shorts and loved the little bit above the elastic casing. It's pretty and fashionable and easy to do. I haven't copied them exactly but you could if you wanted to. Perhaps use 1/2" elastic and make adjustments to your pattern hack.
Rather than tie the bow each time you can make a bow and stitch it in place.
Part 1: The Pattern
Create you new pattern pieces using the video instructions or you can just buy this hacked piece from my shop this time. Future hacks will be on you tube only.
Part 2: Fabric and cutting out
Use quilting cotton or lawn or linen for a neat, crisp look.
Cut out your fabric pieces. Keep track of the backs by marking them with pins.
Mark where the casing fold line goes with a pencil mark on each side of the two fabric pieces.
Mark it on the right side just inside the seam allowance so it won't show after sewing.
Part 3: Casing
Press over the waist edge along the casing fold line on each fabric piece. Finish the top edge by turning it under 1/4" or by overlocking it.
Pin the centre front edges together and stitch.
You can take out the marker pins in the backs. Pink the front seam allowance.
Press the seam to the left.
Fold over the casing and pin it in place.
Stitch close to the open edge.
You need 3/8" for the casing width. I measured the 3/8" and had 1/2" left for the top ruffle edge. I stitched the second casing line 1/2" from the fold. I suggest measuring to make sure your casing will be 3/8" wide because your distance from the fold might vary slightly depending on your accuracy when folding and your fabric.
Part 4: Leg Hems
Do the 1/4" hems along each leg edge.
I decided to do a narrow double fold hem.
Make the first fold as narrow as you can (about 1/8").
Press the second fold using the edge of the first fold as a guide. Hem accuracy is not crucial.
Stitch close to the open edge so you make sure you secure the first fold as well.
Part 5: Elastic
Because my centre front seam is pressed to the left I will be threading my elastic from right to left with the wrong side up. (I hate trying to thread elastic over seams that face the wrong way.)
Measure 10 1/2" of 1/4" elastic.
Use a safety pin to thread your elastic.
When the end of the elastic is level with the right hand side stitch across it, forwards, backwards, forwards. I don't bother to do a double stitch at the beginning or end.
Keep threading. When the end of the elastic is level with the left hand side pin it in place about 2" from the end. Remove the safety pin and stitch this end the same as the first. Remove the pin.
Part 6: Belt loops
Cut a rectangle of fabric 2" x 4 1/2". This should give you just enough for 4 loops.
Fold the belt loop strip wrong sides together and stitch.
Pink the seam allowance.
Manipulate the belt loop strip so the seam sits down the centre. Press the seam open.
Rather than separate the loops I did each one and cut off the remainder of the strip.
Place pin markers 3/4" from the centre front seam.
Make a small mark 1/4" from one end of the belt loop strip, on the wrong side.
Lay the belt loop strip right side down so the length of the strip extends up past the waist and the small mark sits just above the upper stitching line of the casing.
Line up the side edge with the pin marker and pin the strip in place.
Stitch the belt loop on, just above the casing stitching line.
Trim off a fraction of the belt loop seam allowance with pinking shears.
Fold the loop strip down. Measure 3/4" along the strip and mark with a pin.
Trim off the excess belt loop strip with pinking shears, just so the cut skims below the pin.
Turn under the end and adjust it so the fold sits a fraction below the lower stitching line of the casing.
Stitch it in place just below the lower stitching line of the casing.
You need to stitch the loop just above and below the casing stitching lines so you can fit the 3/8" belt ribbon through the loops.
Use the same method to attach the other front loop.
Since making the shorts I have come to the conclusion that it would be easier to add the belt loops before stitching the centre back seam. I found it awkward to fit the waist under the needle with the back seam sewn.
This photo shows the back seam stitched up. The back belt loops are a bit further from the centre than the front loops. Without the back seam stitched you will need to put your marker pins 1 1/4" from the raw edge of the centre back.
Create the back loops in the same manner as the front loops.
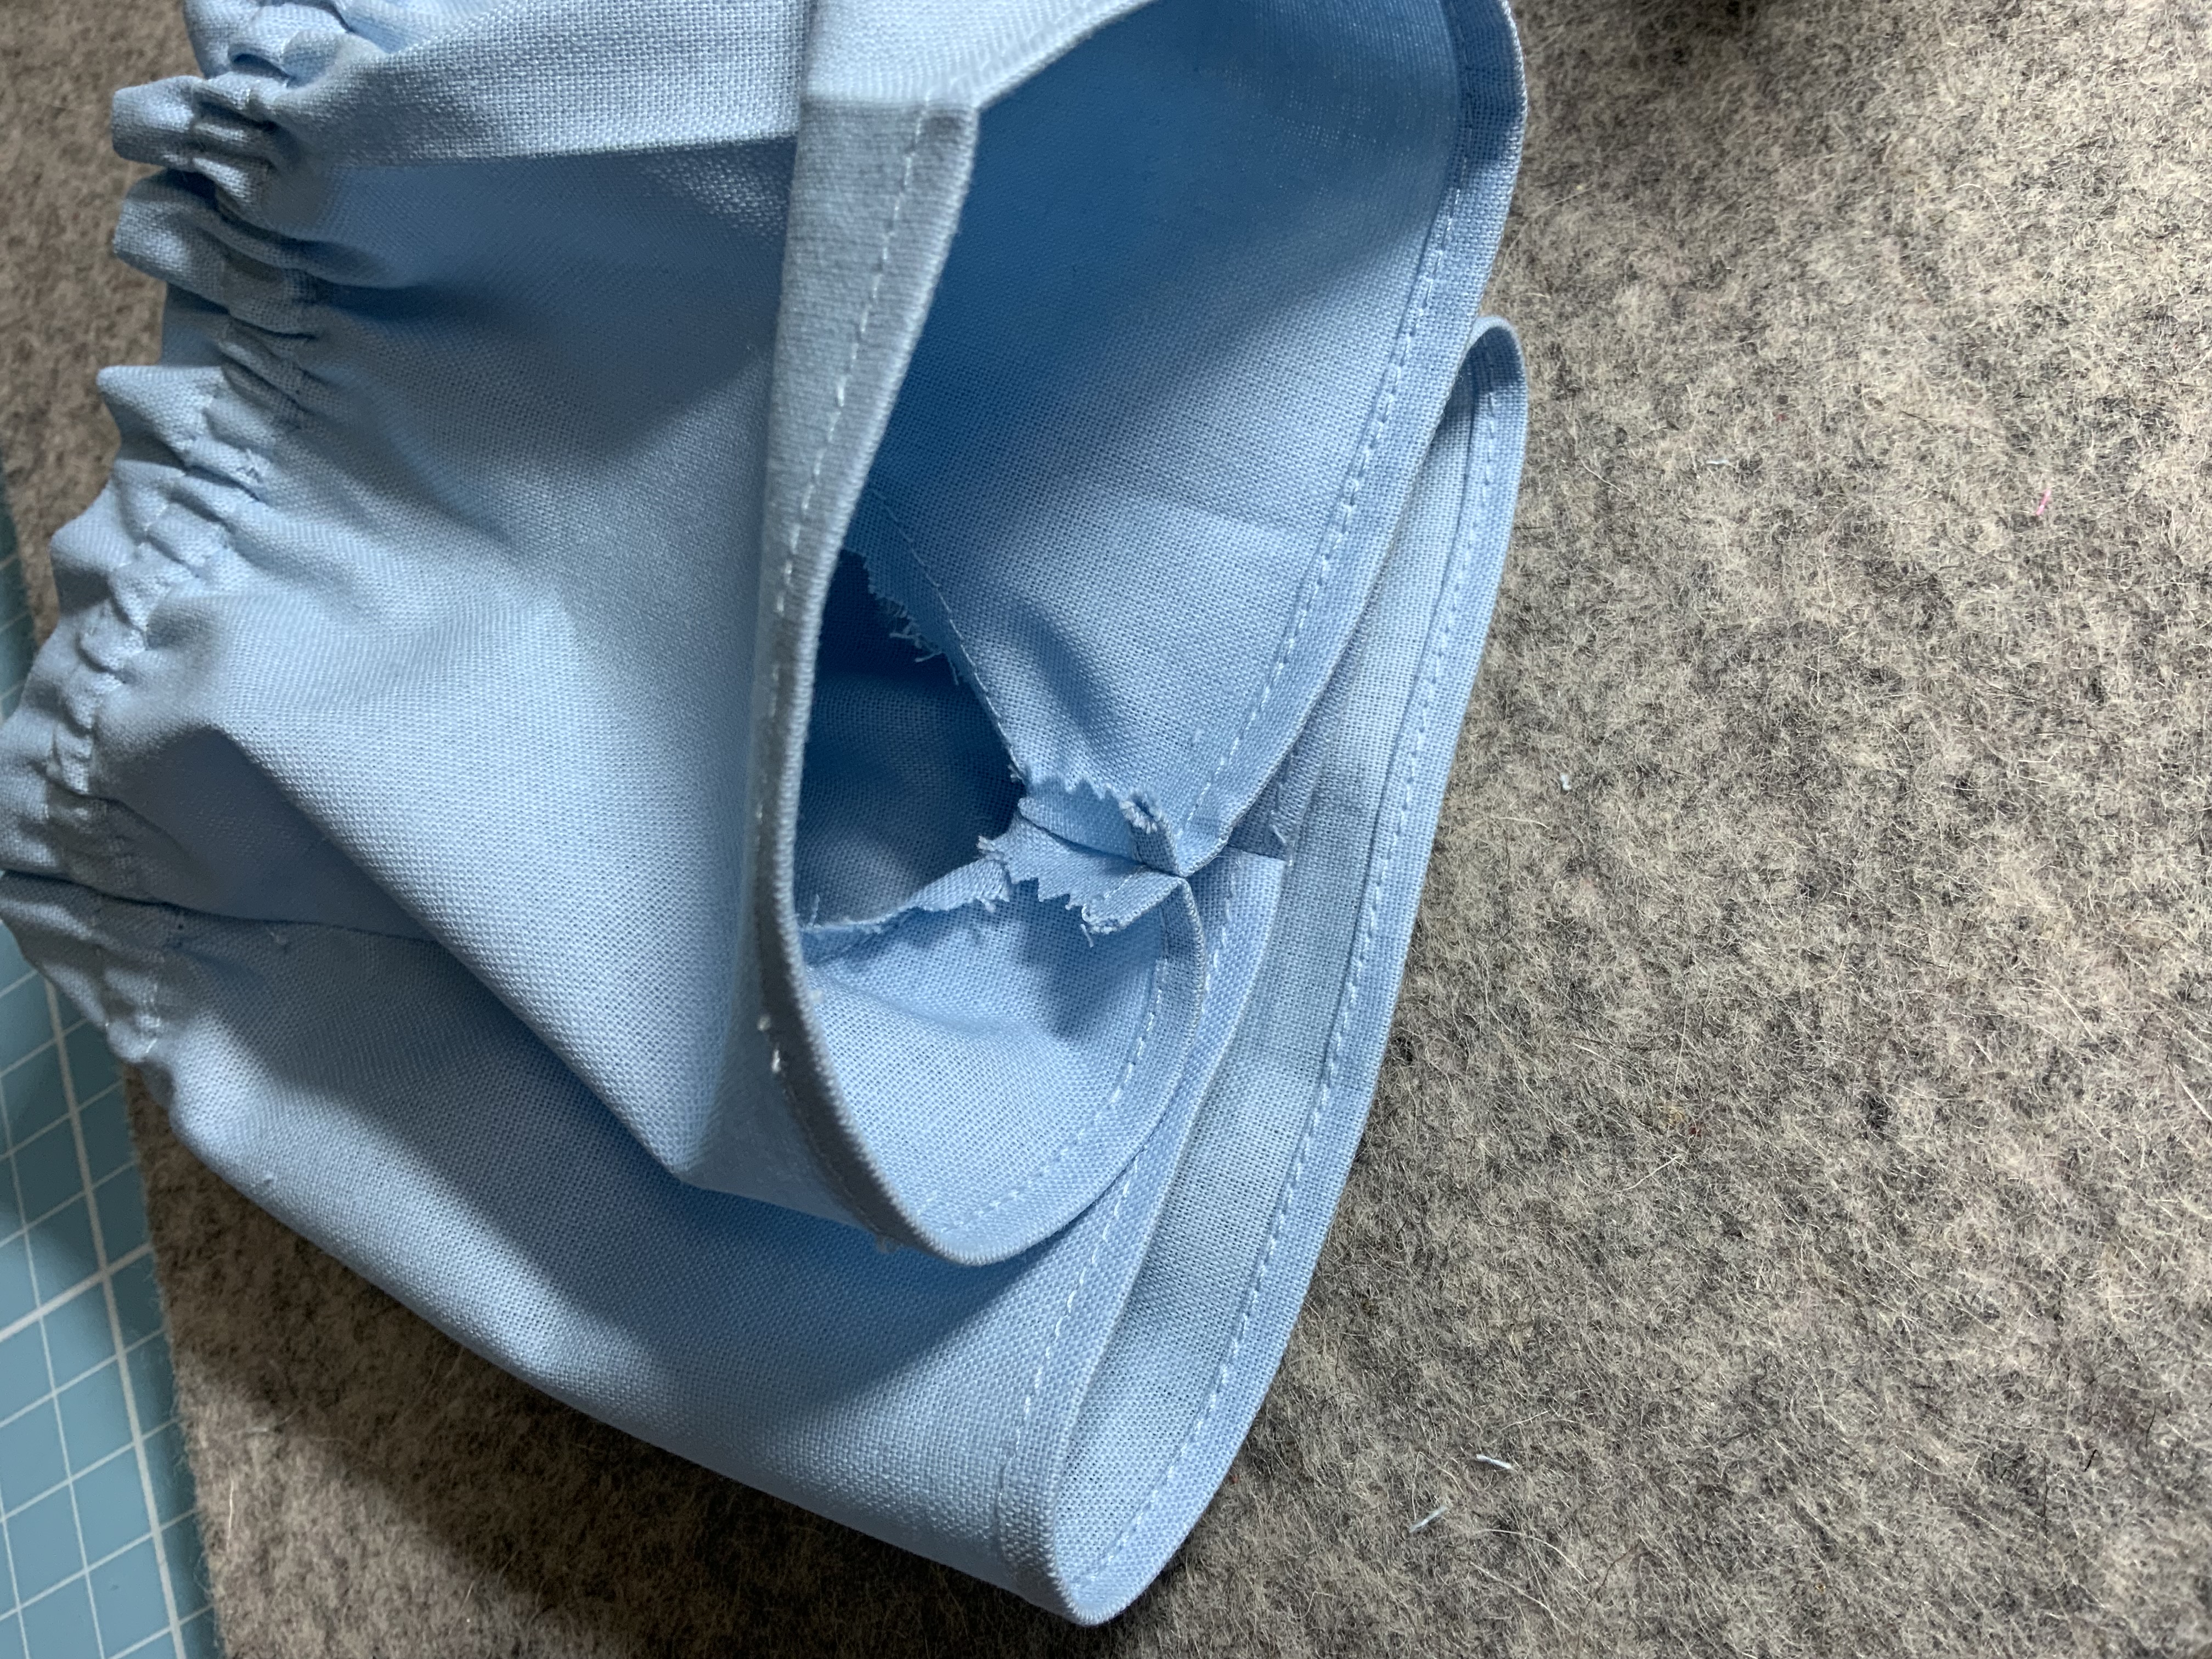
Part 7: Finishing the Seams
Stitch the back seam. Pink the seam allowance and press it open.
Stitch the crotch seam. Pink the seam allowance and press it open.
Part 8: The Belt
Cut 24" of 3/8" ribbon for the belt.
Fold over 3/4" on each end and stitch. Pink the end if you think it needs it.
I did a big fold over and left a distance between the stitching and the end because it is fiddly to sew across the ribbon and it can fray through the stitching sometimes.
You have to undo the belt to put the shorts on and off. This means tying and untying the ribbon.
I did a different version with the belt just in the front. You can find the photo tutorial here (soon).
You can find the hacked pattern piece in the shop here is you don't want to do the hack yourself.