I did this extra sample for 1828 because someone was concerned that the dress was too tight. I suggested it was because they didn't print the pattern pieces at 100% but I still had to check for myself.
I followed my pattern and the finished dress had nearly an inch of ease all down the back.
The other concern was that the sleeves were too short for the armholes. They do need to be stretched a bit as they are sewn in but I have explained that in detail further down.
It never hurts to add some instructions with photos so while I do sample number 3 I have worked on a tutorial that covers most of the making.
Getting Started
When you print out your pattern pieces make sure you have selected custom scale and set it to 100%.
It never hurts to measure the 1 inch square anyway.
When you cut out the piece for the front pin tucks leave 1/4" of fabric sticking out at the top and the bottom. This makes it much easier to mark the fold lines.
Press each pin tuck then stitch 1/8" from the folds.
Press the folds to each side.
Line up the front pattern piece and cut it out.
As usual I have cut out my pieces where ever I can fit them on my fabric. Here I have cut the bias strip for the cap sleeves.
I folded the fabric on the bias, pinned on my pattern piece and cut it out. Then I cut along the fold to get two pieces.
Fold each piece in half and press. Then use the template to cut it to shape.
Usually when I include notches it is because you need to be able to tell side from centre or up from down. I have put a cross to mark the side edge of the back skirts. I then pressed over the back facing just as an extra visual guide.
I find the position for the darts and pleats by folding the paper piece along the lines and ruling or dotting their position on the fabric.
I take the paper pattern off and flip the fabric pieces over then mark the other sides. Make sure you flip the paper pattern upside down too.
Pleats
One side.
Other side.
You need to know the side edges of the backs, so I just put a cross on the fabric near where the notch is for the side seam of the back.
Sleeves
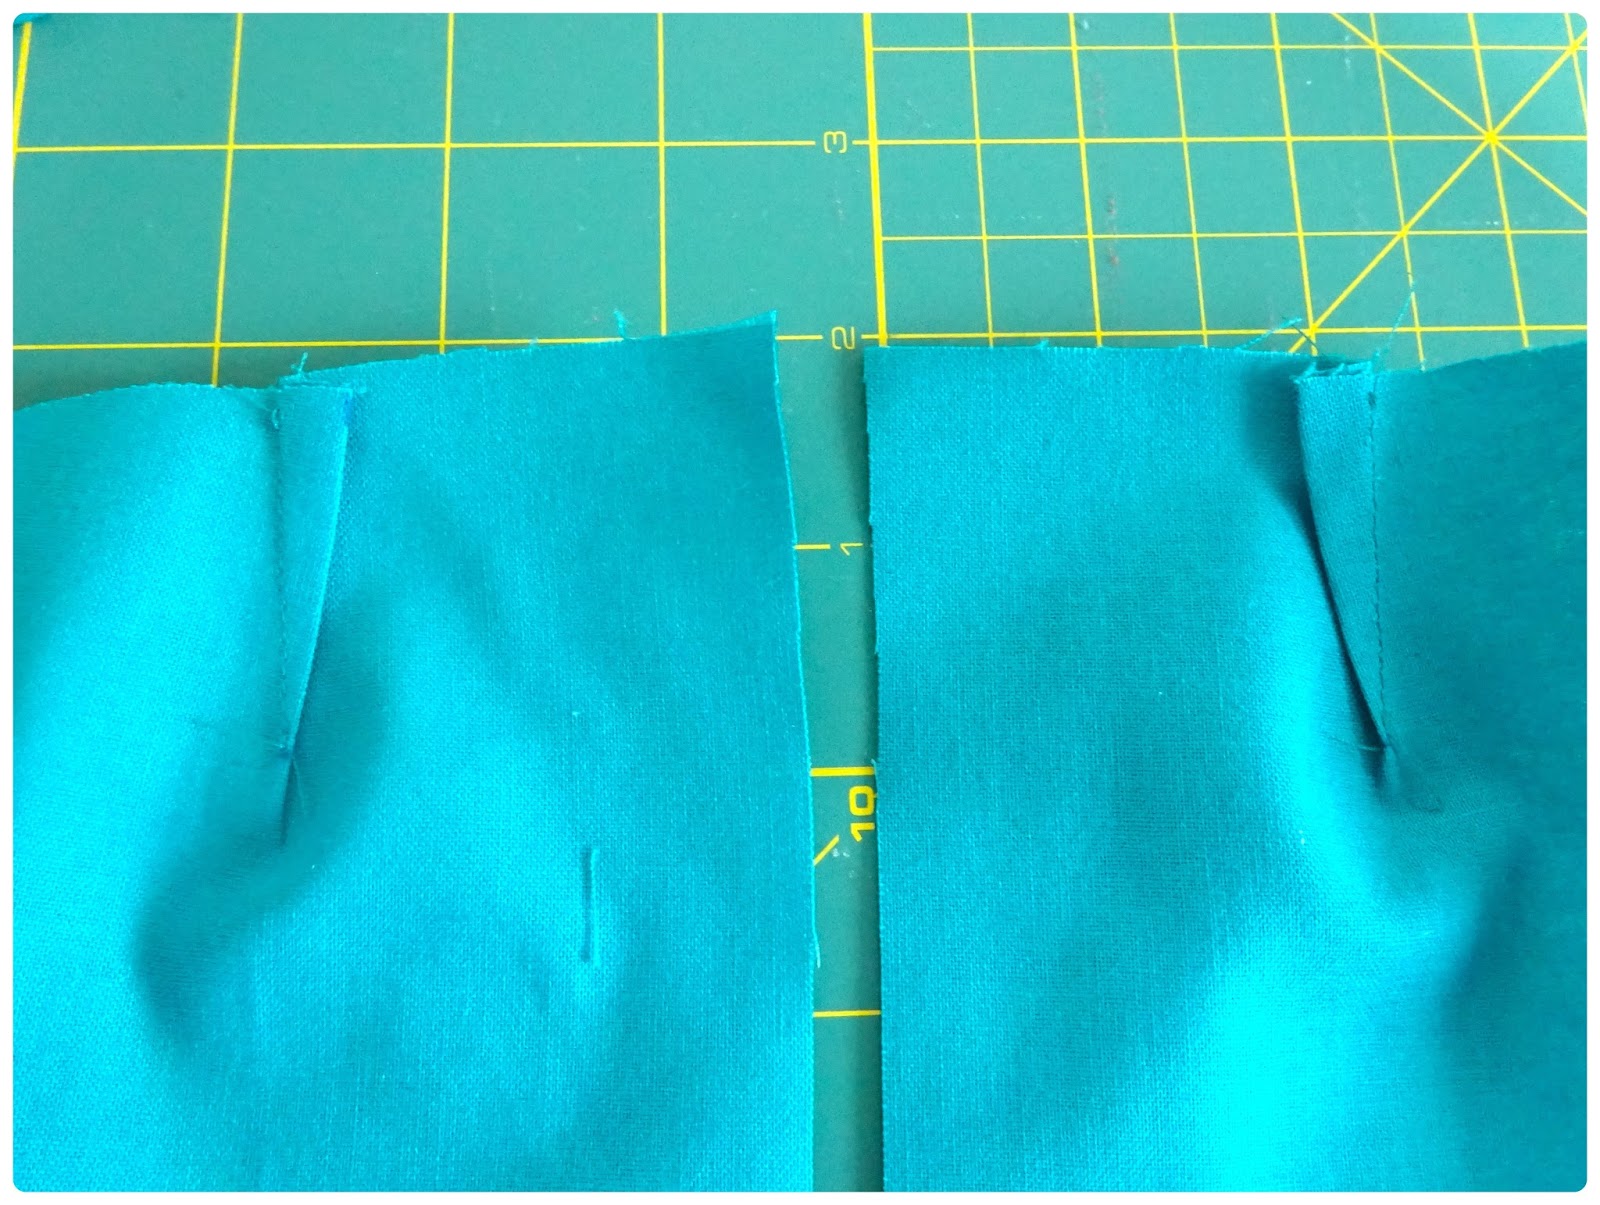
When you come to sew in the sleeves it only works if you have bias sleeve caps because they need to be stretched a bit. If you use straight grain sleeve caps and cut them long enough to fit the arm hole or bias sleeve caps and cut them longer they will wave and gape after you stitch them.
The sleeve on the right of this photo is my first try. I wasn't happy with the way it waved a bit.
The sleeve on the left is the final version. I cut it a bit shorter so it had to be stretched. I think it fits better.
Pin the sleeve caps at each underarm then lie it flat and pin at the shoulder seam. The centre of the sleeve cap is not the exact match to the shoulder seam. The back armhole is a tiny bit bigger than the front armhole. Just lie it flat and judge and even fit along the whole armhole by eye then pin it at the shoulder seam.
These are just small amounts and I think we are all going to get in some trouble if I start giving you exact marks to match. It only takes a small inexactness when cutting out to make the marks all wrong. So use your eye and play with it a bit until you are happy with how it looks.
Stretch the sleeve cap a bit as you sew each half.
Collar
I like to stitch the collar with a short stitch length (2mm). It makes turning the back corner easier.
I also stitch around a paper pattern piece that I have trimmed the seam allowance off. It just makes it easier to get the small curves even.
I also do the top stitching with the 2mm stitch length. I'm hopeless at getting the top stitching even and using a short stitch length for tiny areas like the collar and cuff or pocket flaps just makes it easier to get neat.
When I stitch the collars on I still use the 2mm stitch length because I will be pushing out the corners of the back facing.
The Skirt
When stitching the darts and pleats I used a short stitch length (2mm) instead of my normal 2.5mm.
It just gives a firmer finish.
I decided to stitch the centre front seam before doing the pleats just because the pieces are small and sewing them together makes one bigger piece that I found easier to handle.
When you stitch the back darts, press them towards the centre backs. You can see I forgot to overlock the centre backs. If you overlock them early you won't get the side edges mixed up with the centre backs.
When I stitched the side seams I found there was a 1/8" discrepancy with the length of the front and back. I am going to leave that for you to smooth out. I didn't touch the centre front. I just took a bit off the side edges.
Here I have trimmed the seam on the left.
Joining the skirt and bodice
I am no exacto freak when it comes to stitching seams and darts but my bodice and skirt matched easily.
Just make sure you measure the 1/2" for the facing at the waist and check at several places along the facing. Adding a bit to the facing fold anywhere along the back can make the dress too snug.
On the skirt
At the waist
Finishing
I always use velcro patches. I put the neck and the waist in place then stitch in the middle piece just placing it by eye.
All done.
The people pattern that I used for this doll design had a view with a monochrome dress and jacket. One day I might make the jacket using pattern 1829.
If you want to make a skirt using pin whale corduroy or something thicker than shirt weight (I have used homespun here) you should print the pattern pieces at say 105%. I have used 102% for flannelette weight but you may need more for the corduroy. I haven't actually tried it in corduroy yet.
Happy Sewing,
Val