Showing posts with label doll clothes. Show all posts

Friday, April 26, 2019

How to sew a doll skirt with a waist band

How to sew a skirt for doll clothes


How to sew a doll skirt

A friend of mine asked me if I would make an outfit for her vintage doll to replace the original clothes the doll came dressed in. You know how it is. The clothes were just gone.

If you think you are ready to move onto making a gathered skirt with a waist band I am slotting this blog post ahead of more elastic waist variations because I promised to dress the vintage doll.

I have quite a few skirt patterns in my Etsy shop. I have yet to publish them in my Aussie shop. Just let me know if there is something you want me to upload.

I love these vintage suspender skirts


Make sure you check out this tutorial for the Glitter Girl gathered skirt HERE.

And you can find lots more about designing a gathered skirt in this blog post HERE
Also you can join my free resources library.

How to sew a gathered skirt for your doll

The skirt part

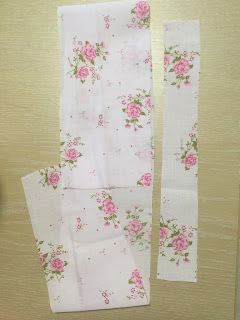
This doll is about 14" tall so I am going to use the same size skirt that I made for the Glitter Girl because that amount of width at the hem looks good on this doll too.
I am cutting the skirt strip 4 1/2" x 24". I ended up using the same pattern piece that I used for the netting in this skirt HERE

valspierssews doll clothes patterns


If I was making the skirt for my:

  • 18" dolls I would cut the skirt strip 6" x 30"
  • 19" Gotz Hannah doll I would cut 6" x 30"
  • 20" Australian Girl Doll I would cut 6 1/2" x 30"

This allows for a waist seam of a good 1/4" and a hem of a good 1/4".
I say 'good' because I find that you always need a bit more to cover the gathering threads and you always cut a fraction off when you overlock the hem edge.

Skirt Pieces
Overlock the back facing edges.
Overlock the hem edge and turn up a 1/4" hem.
Press in the back facing about a 1/2".


The waist band

Just remember that the thicker your fabric the longer the waist band needs to be.
My waist band will enclose the waist seam and overlap by 1/2" at the centre back.
This means I need to measure the doll's waist then add 1/2" for the overlap as well as another 3/4" for the seams on each end. I say 3/4" because it always seems to work out as a bit more than a 1/4" overhang at the backs when you pin on the waist band. If you want the skirt to go over a blouse or T-shirt you should measure the doll's waist over the blouse or shirt or add an extra 1/8" on a small doll and closer to 1/4" for big dolls.

The vintage doll waist is a bit less than 8 1/2" so I am going to use 8 1/2" + 1/2" +3/4" = 9 3/4 for my waist band strip.


Because the doll is small I will use a 3/8" finished width for my waist band. For bigger dolls I would use 1/2" finished width. If your fabric is thicker than light cotton or polycotton you should allow an extra 1/4" for folding the seams into the waist band.

Press in a 1/4" on one long side of the waist band.
Pin the right side of the waist band to the wrong side of the skirt.
Keep the back facings folded in and extend the ends of the waist band 1/4" past the skirt backs.

valspierssews doll clothes patterns


Stitch then trim the seam a bit. Press the waist band up towards the seam.
Fold in the ends of the waist band then....
Fold the turned under edge to the front and stitch it down. I use a small patch of hook and loop at the waist in the back.
I now have a skirt pattern I like for this doll. I will be making the outfit skirt next.


If you are looking for patterns for various skirts for various sized dolls you should look out for my Pattern Club opening soon.

New Pattern Club Coming Soon

I am starting up a membership site in the next few months. I already have a few patterns in place and I have 3 great new patterns lined up for the first month's instalment. I will be opening the enrolment for 10 days only. Founding members will have the lowest price of $10USD/month. Every six months over a couple of years I will be opening membership with an increased price. The final subscription fee for a huge pattern resource and continuing new additions will be around $20USD


If you don't want to miss out on the sign up period click the link below and leave your email address. (This is a separate list from my newsletter)

Sign up to be notified when the Valspierssews Pattern Club is open to join

I will still be adding free resources to my Resource Library at dolldressmaking.teachable.com 
If you are not already signed up you should check it out.


Happy Doll Dressmaking,
Val


Friday, January 11, 2019

How to Make Doll Quilts Part 2

This is the progress on my quilt. I have a finished flimsy.
Doll quilts from little squares are easy and fun to make unique. You can read a bit about the history of doll quilts in Part 1
If you aren't a quilter with a stash of wadding in the cupboard...


...then you can use a towel as wadding or even as wadding and backing in one.

My flimsy is on a bath towel. Whatever you use as wadding trim it so about an inch sticks out all around. You would be surprised how the wadding shrinks as you do the quilting.

I'm going to do some simple quilting diagonally on this quilt.
I will use my wadding and back it with pale pink and do the binding in the same pale pink.

I am making a photo tutorial to put in my resource library on dolldressmaking.teachable.com

Sign into my Resource Library of free and paid tutorials and patterns.

I will blog the basics next week once I have the quilt finished.

Quilts with little squares offer lots of variety. Doll quilts are so quick to make so you can attempt more complex designs, not just rows of squares.

You can make a simple quilt unique by adding
  • some applique
  • changing up the layout
  • and/or using colour to create shapes and designs
I love this wall hanging with the heart applique.
Source: https://pin.it/laxqq642yfkpfi

This one has an extra border of smaller squares.

Source: https://pin.it/filhxnyxgkguiz

One of my favourites is just rows of squares with a binding. You can make your quilt any size. You can make quilts with different size squares. Using 3" squares in a 4x4 layout makes a cute quilt and is very fast.

Source: https://www.pinterest.com.au/pin/281615782922260244/

This is how my quilt turns out.


See part 1 HERE

Happy Sewing and Doll Dressmaking,
Val

Saturday, November 3, 2018

Doll Clothes Petticoat Pattern with a 50s Look and Some Life Philosophy.

I love designing and one way to share my designs with as many doll dressmakers as possible is to offer them for free sometimes.


My next newsletter is due out in early November 2018 and if you are on my mailing list or join up before I send out the November newsletter you will be able to download the 50s petticoat pattern for free.
It only comes out in this one newsletter. You will not see this pattern for free any where else or at any other time. You must be subscribed to the newsletter before it comes out.

There is no link to the free petticoat pattern on this blog post. If you would like this petticoat pattern for free you   need to be signed up for my newsletter   before November 9th 2018.

The design has princess seams on the bodice. The bodice is shaped in the front and straight across the back and there are ribbon straps.
The skirt is a circle skirt made up of 4 quarter circles. The waist points down in the front and the garment opens all the way down the back with a 1/2" overlap for closure.


This petticoat bodice is lined so if you want the lace trim to stand up properly after stitching the bodice to the lining you will need to fold the ends of the lace at a right angle so it is not caught in the back seam. I will go into more detail on this in my Facebook Group this month. You can Join Here

I used the pattern from Underwear No. 5 to start developing this design. I used the same back pieces and changed the front. I already had some work done on the pointed front with another design but adding the point is very simple. For the skirt you just echo the point for the front skirt.
So if it is so simple to make a new design why do people buy my patterns? The main reason is that doll dressmakers want to make one garment and use their best fabric.

This pink petticoat is my first draft. There are a couple of things I am going to change to make it even better. This is my prototype.
What needs work?

  • The front points need to be a bit higher. I have tried to pull it up a bit in front for this photo so you can see it has some wrinkles. I couldn't believe how amazingly better it looked when I raised the bodice by 1/4".
  • I am going to deepen the point a bit. I have decided on 1/8" lower.
  • I'm happy with this length but I had to cut off an inch from the original skirt.
  • I only stitched the strap into the front bodice and sewed it on top for the back. I had to do this so I could judge the length of the strap. Now I know the length and the angle I have to cut it in the back so the next version will have the strap enclosed in front and in back.
I am always analysing why I do things. 
Back in June I posted on my Life Blog about how I hoped other people would see me. 
The following thoughts help me know that what I am doing is in alignment with my life values. I have quite a list of values that are important to me. For example, I strive to be creative, honest, passionate, generous and sincere and self-confident. It is quite empowering to have such strong guidelines. It makes life and business decisions much easier.

A bit of philosophy on why I turned my designing into a business.

I will be making at least two more petticoats while writing and checking the instructions for this design. All my efforts provide value for doll dressmakers. 
  • You can be 99% sure the garment will fit and look great. (You should always check the waist of any pattern bodice against your doll first)
  • You only have to make one but you won't want to stop at one when you see how versatile each pattern is.
  • You can use nice fabric first go.
  • You can follow the instructions to get all the steps in the right order. This saves mistakes and unpicking.
  • You can be confident the design will look as you expect.
A bit of philosophy on why I do some things for free.

Why am I offering such great designs for free? There are a number of reasons.
  • I love helping other doll dressmakers
  • I want to spread the word on how great my patterns are.
  • I want to promote my newsletter because I love connecting with like minded people.
  • I am passionate about designing doll clothes and want to share my skills.
  • It helps me grow in self confidence and independence because it helps my business grow.
  • All this is part of my grand plan to be happy and successful, share my knowledge and skills and be financially free to continue helping and sharing in all sorts of ways.
I am constantly being inspired by all the wonderful doll dressmakers all over the world. 
I hope you enjoy my patterns.

Cheers,
Val


Friday, July 6, 2018

How to Sew Doll Clothes: Using Buttons


Sometimes I can be a bit impatient when it comes time to choose the buttons for my doll clothes.

However it usually pays to take your time and try different combinations.

Sometimes several different colours and sizes look good but if you try several colours and sizes often one combination will stand out as looking great.

You may also need to try different spacing and 5 buttons or 6.

I always sew on my buttons with the machine and the button foot. You can see my blog post tutorial here.

Heart Buttons

I tried a couple of different buttons before deciding on the hearts for this blouse. They just stood out over the regular buttons.
You can see that the spacing is quite wide. This is 7/8" from centre to centre of each button. I didn't want the buttons to overwhelm the rest of the outfit, just add to it. I'm pretty sure I bought these heart buttons in a bag of several different sized hearts from my discount craft store, Spotlight.

Decision points:
  1. must be red as a feature since I didn't do the piping on the collar
  2. looking for small buttons. The hearts were the right size
  3. spaced them so the bottom one fell above the skirt band rather than just on it.


Matching Pink Buttons


These buttons are meant to blend in with the blouse. I just had to decide on the size. I ended up with these tiny 1/4" ones because I like the solid quality of them. I have other thinner ones but I thought these added to the vintage look.
I have placed them 3/4" apart by mistake. I meant to do them 7/8" like the hearts but as you can see they look OK. Maybe a little bit busy looking and detracts from the other features. Because the buttons are small it doesn't look out of place.

Decision points:
  1. must match the blouse fabric
  2. small so they don't stand out too much
  3. thick and glossy rather than thin and translucent because I thought they looked old fashioned
  4. spacing was meant to be 7/8" so they didn't look too busy.

When I did the skirt I tried different shades of pink buttons as well as different sizes. I loved these dark ones with the 4 holes and it took me ages to find a matching pair in my button bag collection.

Decision points:
  1. dark colour to stand out against the pale pink in the skirt
  2. medium size so they have the same dramatic affect as the check in the skirt. They stand out almost equally.
  3. 4 holes because it looks kind of vintage and more like suspender buttons than blouse buttons.
Happy Sewing,
Val

Valspierssews
Tinker, Tailor, Doll Dress Maker

Monday, July 2, 2018

Easy velcro patches on doll clothes. Much better than strips.

I always use velcro patches instead of strips.
This is a vintage blouse with piping.

I love piping but I am definitely not a fan of putting piping on the collar. However, I am really happy with how it turned out.

I will probably stick with piping on the sleeves, a plain collar and coloured buttons to match the piping. It looks great. I will put up some pictures soon.

Today I am working on acute vintage blouse that goes with any of the suspender skirt patterns I am making.

Skirt 1882 is in the shop for just $4 AUD.  It is teamed with 1806 Open Neck Blouse.
See how you can make a circle skirt version here or keep an eye out for the circle skirt version in the shop.


The vintage blouse will be published soon. Keep an eye out.

I like to use just three patches on a blouse.
Do the top and bottom first then just centre the middle one by eye.
I will not line a garment unless it has no sleeves or no collar. I find lining for the sake of it just makes the garment stiffer and less normal looking. The front facing I have drafted fit very neatly into the shoulder. You would never know there is just a facing.

The hooks go on first under the right front.
Then the loops go on top of the left front.

I lay the fronts like this so I can position the loops.
Just hold it in place to put it under the needle.

All done. It only takes a few minutes.
It is easy to close and open and the small pieces
are easy to get out of the hair if that is where they end up.
Ready for the buttons.
I have used matching thread in the bobbin so the stitching hardly shows.
I think I used a velcro strip on my first ever garment and never again. I am really happy with the patches. You should give them a go.

Happy Sewing,
Val

Saturday, January 28, 2017

How to Sew Doll Clothes: When you need a pusher


I love my pusher. Trouble is every time I use it I think of train pushers.

There are various times when a pusher comes in handy but the most often use for my pusher is to get around those hard to top stitch points on collars or corners on cuffs.

I have just turned and pressed my collars and I need to top stitch around them.


I start by stitching 1/8" from the edge.


When I get to the corner I keep the needle down and lift the presser foot.


The narrow slot just fits around the needle as you slide it under the collar.


Do 3 or 4 stitches then with the needle down, lift the presser foot and slide out the pusher.


Continue stitching around the collar. You gat a nice neat corner.


My pusher is an old birthday card. When it gets wrinkled or bent I can easily make a new one.


Happy Sewing,
Val


Sunday, December 25, 2016

Prototype for New Pyjamas Pattern

Pretty quiet here today. Just us two this year.
I had a need to fill the time with designing and sewing.
This one is part of a pyjamas collection.


It needs some buttons down the front. I will probably instruct you to put those on before sewing on the skirt. I wasn't sure if I wanted to have it open or not at this point.

The flounce needs to be 3/4" longer.

I have also adjusted the overall ease for the pattern and added a bit more depth to the armhole.

I will be checking the new changes out on a front opening top and my cute yoga cats flannel.
I can see all sorts of possibilities for variations with this one.

It will come with boxer style long and short pants and nighty length flounce and maybe short gathered sleeves. Of course you can add to the ideas by using my 1801 Classic knit tops pattern. The only change I have made to the neckline is to enlarge it to 102% so it would also be possible to add collars from 1804 Round Neck Dress if they are enlarged to 102% as well. You can also have no front opening and put some trim down the centre front. I used my pom pom trim for the cuffs on this one.

Lots going round in my head and some ideas for free things made out of rectangles.

Happy Sewing,
Val

Saturday, September 24, 2016

My Latest Doll Clothes Pattern

valspierssews doll clothes

I have been working steadily on the cute panel dress requested by one of my readers. I just want to try out the skirt with more flare before I publish it.

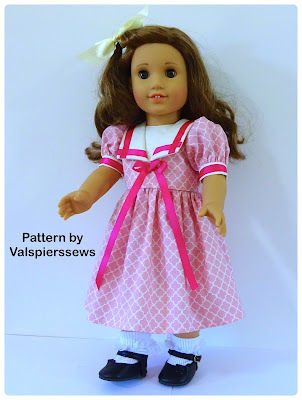
To take a bit of a break from that design I started playing with all the different shaped sailor collars I have seen. I have drawn up 5 collars that all fit on the same neckline. Having the neckline as a starting point enables me to change the shape of the dress or bodice just below the V and make very different looking designs.

The one I have just published was inspired by this image.

From Pinterest

I was inspired by the dress I found on Pinterest.
I made the sailor suit top and added a lined dress bodice front to get the round neckline.


Happy Sewing,
Val
Thursday, August 25, 2016

Patterns that will be published soon

Valspierssews
Progress on some new patterns

I have been busy working on the sailor suit and I now have an American/Australian version of the 1920's sailor suit as well as a European style. I have just got to fine tune the instructions and they will both be out very soon. I am just waiting on a customer to check if I have created what she envisioned for the European sailor suit.

Before the sailor suit request I had the seven gore skirt samples sewn up. It has 3 panels in the front and 4 in the back. The centre one is cut in half to make the back opening, hence 7 panels. This design will include the skirt with a waistband as well as a skirt to add to any of the dress bodices in the Snugfit Range of patterns. I just need to do the instructions.

To have a break from the sailor suit I decided to design a dress from an old McCalls pattern.


Source: https://au.pinterest.com/pin/243124079863314370/
It has turned out so cute. I just need to put on the little pocket flaps and the buttons. I will make a few slight changes by making the neck a fraction bigger and flatten out the collar. The sleeves were a bit of a challenge to get the pleats just right to make the sleeve fit into the armhole neatly. I think I will have to make some little white gloves too.

I collect a lot of ideas for doll clothes patterns that I would like to make in my Pinterest Board: Doll Clothes Inspirations.

I am happy to make up requests. Why not have a look through my Pinterest Board and let me know if there is something you would like to have made into a pattern for an 18" doll. The sailor suit was a request and it has been a lot of fun to get the details right.

The girls love getting new outfits.


Happy Sewing,
Val


Thursday, August 11, 2016

Progress on the Sailor Suit for 18" Doll: First Fitting

I am working on a vintage style sailor suit for both a boy doll and a girl doll. I have started on the boy suit first.

First Fitting

There will not be much difference in the style for the girl but I thought I might gather the sleeve at the shoulder a bit and of course it will have a pleated skirt.

The first fitting for the top has revealed that I need to make the sleeve 1/4" shorter. This means I have to adjust the cuff to make 1/8" narrower. The stripes are going to be very narrow on the cuff and the collar.

I lined the bodice to finish the neck edge neatly but this is a bit of a bother so I might just settle for turning the seam to the inside on a single bodice layer. The collar and scarf will hide any under stitching. The only ribbon I could find was a bit narrow. I think I will be making a little scarf and attaching it under the collar at the shoulders. This top opens at the back.

The collar is looking OK but I might try to make it a bit wider at the front and across the shoulders. I think I will actually keep this collar and include the wider one as an option.

There are lots of variations on the sailor suit but I have settled on these two images as my guide.

One is from this page on the Royal Family. Scroll down a bit to the Duke of Windsor as a child.

The other is a little boy on a Christmas card.

I might make the hem of the top a bit wider. I plan to gather it with some narrow elastic so there is enough to tuck in the shorts and then blouse it over the waist band.

Other options will be a band at the bottom of the top.
I really like this design.

I probably won't include a pattern for the shorts or the skirt. The shorts can be made using the 1813 gathered pull-ons pattern and the skirt will be the same as my free pleated skirt with a yoke.

Happy Sewing,
Val


Thursday, June 16, 2016

Doll Style: The Skater Skirt

The skater skirt is such a cute fashion statement.

It can be bright and saucy.


It can be cute and sassy.


It can be streetwise.


This skirt takes about 20 mins to make. When I made the black one I didn't have any 1/4" elastic left so I made a circle from 10 1/2" of my 1/2" black elastic. I used pins to quarter the waist and elastic then stitched with the darning zig zag stitch. The elastic sits flat on top of the waist.

The skater skirt and hankie skirt patterns come as one file in my shop.


Happy Sewing,
Val