Showing posts with label Petticoat. Show all posts

Thursday, February 18, 2021

Free Petticoat pattern for 18" dolls and 14" dolls

Valspieresews doll clothes

Since making some petticoats and adding them under my doll dresses I must say the outfits look much prettier. The skirts stand out nicely and look just great.

Being a practical person I am a fan of the half petticoat. 

Full petticoats are more difficult to fit under a dress. It is surprising how much ease disappears from the dress when you put a petticoat under it.

Full petticoats need to be made from special fabric like lawn or batiste so they are not too bulky.

The half petticoat can be swapped on and off without taking the dress off.

It can also be adjusted for length slightly just by moving it up and down the dolls body.


Saturday, November 3, 2018

Doll Clothes Petticoat Pattern with a 50s Look and Some Life Philosophy.

I love designing and one way to share my designs with as many doll dressmakers as possible is to offer them for free sometimes.


My next newsletter is due out in early November 2018 and if you are on my mailing list or join up before I send out the November newsletter you will be able to download the 50s petticoat pattern for free.
It only comes out in this one newsletter. You will not see this pattern for free any where else or at any other time. You must be subscribed to the newsletter before it comes out.

There is no link to the free petticoat pattern on this blog post. If you would like this petticoat pattern for free you   need to be signed up for my newsletter   before November 9th 2018.

The design has princess seams on the bodice. The bodice is shaped in the front and straight across the back and there are ribbon straps.
The skirt is a circle skirt made up of 4 quarter circles. The waist points down in the front and the garment opens all the way down the back with a 1/2" overlap for closure.


This petticoat bodice is lined so if you want the lace trim to stand up properly after stitching the bodice to the lining you will need to fold the ends of the lace at a right angle so it is not caught in the back seam. I will go into more detail on this in my Facebook Group this month. You can Join Here

I used the pattern from Underwear No. 5 to start developing this design. I used the same back pieces and changed the front. I already had some work done on the pointed front with another design but adding the point is very simple. For the skirt you just echo the point for the front skirt.
So if it is so simple to make a new design why do people buy my patterns? The main reason is that doll dressmakers want to make one garment and use their best fabric.

This pink petticoat is my first draft. There are a couple of things I am going to change to make it even better. This is my prototype.
What needs work?

  • The front points need to be a bit higher. I have tried to pull it up a bit in front for this photo so you can see it has some wrinkles. I couldn't believe how amazingly better it looked when I raised the bodice by 1/4".
  • I am going to deepen the point a bit. I have decided on 1/8" lower.
  • I'm happy with this length but I had to cut off an inch from the original skirt.
  • I only stitched the strap into the front bodice and sewed it on top for the back. I had to do this so I could judge the length of the strap. Now I know the length and the angle I have to cut it in the back so the next version will have the strap enclosed in front and in back.
I am always analysing why I do things. 
Back in June I posted on my Life Blog about how I hoped other people would see me. 
The following thoughts help me know that what I am doing is in alignment with my life values. I have quite a list of values that are important to me. For example, I strive to be creative, honest, passionate, generous and sincere and self-confident. It is quite empowering to have such strong guidelines. It makes life and business decisions much easier.

A bit of philosophy on why I turned my designing into a business.

I will be making at least two more petticoats while writing and checking the instructions for this design. All my efforts provide value for doll dressmakers. 
  • You can be 99% sure the garment will fit and look great. (You should always check the waist of any pattern bodice against your doll first)
  • You only have to make one but you won't want to stop at one when you see how versatile each pattern is.
  • You can use nice fabric first go.
  • You can follow the instructions to get all the steps in the right order. This saves mistakes and unpicking.
  • You can be confident the design will look as you expect.
A bit of philosophy on why I do some things for free.

Why am I offering such great designs for free? There are a number of reasons.
  • I love helping other doll dressmakers
  • I want to spread the word on how great my patterns are.
  • I want to promote my newsletter because I love connecting with like minded people.
  • I am passionate about designing doll clothes and want to share my skills.
  • It helps me grow in self confidence and independence because it helps my business grow.
  • All this is part of my grand plan to be happy and successful, share my knowledge and skills and be financially free to continue helping and sharing in all sorts of ways.
I am constantly being inspired by all the wonderful doll dressmakers all over the world. 
I hope you enjoy my patterns.

Cheers,
Val


Thursday, August 16, 2018

How to Sew Doll Clothes: Petticoat straps for doll clothes

I am always a bit wary of satin ribbon when I need to secure the ends in a garment.

It tends to fray really easy so you need to allow plenty of overlap into a seam allowance and I like to stitch it more than once in order to secure it and prevent fraying.

When I put the straps in the bodice of my petticoat from Underwear No. 4 view 1 I had a 1/2" extending past the seam line. I cut two straps 5 1/2" long and put little dots a 1/2" in from the ends.


I lined up the dots with the seam line on the bodice where I had my pins to mark the position of the straps and pinned the ends in place.


I then stitched forward, back then forward again to secure the ends in place before adding the lining.
After securing the two fronts of the straps I curved each strap to lie correctly and pinned the back end in place then stitched each back end to secure it.


After enclosing the straps in the lining I trimmed the seam allowance around the bodice but I made sure I didn't cut off the stitching I used to secure the straps originally. This means there are two lots of stitching to prevent fraying of the ribbon if it is played with a lot.

For View 2 which isn't lined I secure the satin ribbon straps by stitching them to the wrong side first then folding the strap up and stitching them again. This also gives me two lots of stitching to keep the ribbon from fraying.

Mark the strap positions on the wrong side.


Place the ribbons right side up if it has different sides. Most satin ribbon is double sided. Make the ends level with the top of the bodice.

Stitch across each end 1/4" in from the end.


Pin the backs of the straps so they will lie flat on the doll and stitch across each end.


Fold the ribbon up and stitch across each end again, close to the top edge.


It is as neat as possible on my very sheer hankie fabric


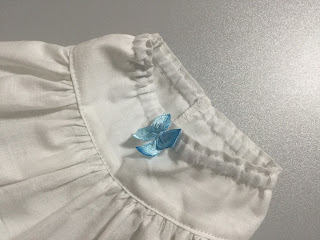
Add something to cover the ends if you like. I just zig zagged across the bows the same as sewing on buttons.


I preferred my fancy trim for this design.


Happy Sewing,
Val
Wednesday, August 1, 2018

Preview of 18" Doll Clothes Patterns Underwear No.4 by valspierssews

I have wanted to draft a collection of underwear items like petticoats and panties and singlets and camisoles for several years now. Time just gets away while I work on the daywear. But, now is the time! I have committed to 5 items that I will be giving away for free in 5 of my newsletters over 5 months from August to December 2018.

The freeness will expire for each one after a week or so and then it will go in my shop.

Petticoat 1 (Underwear No. 4) is a simple design that was inspired by this image -

I believe it is a page from a paper doll book (1991) by Teresa Borelli but there isn't much that I can find about it.

It has a cute dolly look about it that I have tried to recreate for 18" dolls.


Happy Sewing,
Val

Free Petticoat Patterns through my Newsletter Valspierssews News

Valspierssews


Petticoats are just so sweet. They have a distinctly dolly feel these days because hardly anyone wears petticoats anymore.

The first one in my free collection is a simple vintage looking design.
It is very quick to make.

You can add lots of trims or just a bit. I bought a packet of ready tied bows that are perfect to add to underwear.


I have placed the skirt pieces at the top a the page so you can easily adjust the hem edge before you cut out the pattern pieces. Make pattern pieces for several different dress lengths or customise the length for each dress you make.


Valspierssews dress patterns have just enough ease to fit over the petticoat and still do up.


I have included instructions for two views. One with the finished border edge and one with a lined bodice.


Make sure you are subscribed to my newsletter before 14th August Australian time so you don't miss out. There will be 5 different petticoat patterns. One each month for the rest of this year.

When the second newsletter comes out for that month I will take down the free file and put it in my shop.

You can sign up for my newsletter HERE

Happy Sewing,
Val