I love sewing 18" doll clothes. It seemed a natural progression to start designing them too. You can read all about my life journey on valspiers.substack.com
There are two ways to get the hacks. You can watch the videos and DIY or you can buy the pack from my Etsy shop. (Coming soon the the shop)
This video shows how to hack the pattern. This blog shows how to sew the shirt.
If you find this sort of tutorial useful please like and subscribe to my You Tube channel.
Hack C has a few small changes with the front and back yokes and it includes cute contrast western cuffs above the regular cuffs.
This is how I put it together.
The Back
Fold the yokes and the lower back in half and press to crease.
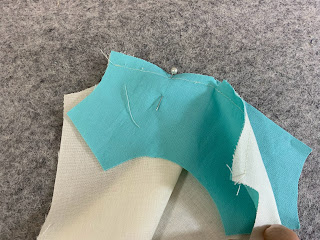
Stay stitch the lower back either side of the valley. Snip the valley to the stay stitching.
Pin the wrong side of the lower back to the right side of your yoke lining piece.
Just on the first half.
It doesn't matter whether you sew on the yoke lining or the main yoke first.
Stitch to the snip.
With the needle down, raise the foot and turn and move the pieces so you can continue stitching to the other side.
Fold the yoke and cut out a little V so it will sit flat.
Pin the right side of the lower back to the right side of the main yoke.
Follow the stitching line for the yoke lining to where it changes direction at the snip.
Turn and arrange the pieces so you can stitch to the other side.
Cut the little V in the main yoke.
Trim the seam to reduce the bulk at the point.
Pin the yokes together at the shoulders and gently pull to the left with your left hand while you press the seam flat.
Aligned
Make sure the shoulders are aligned
Not aligned
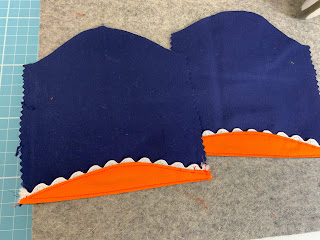
Keep the shoulders pinned together and add trim.
Enclosing the rick rack
If you are going to enclose the trim in the seam for piping or rick rack you will need to sew it in place on the main yoke piece before stitching it to the lower back.
The Fronts (adding trim after sewing the fronts)
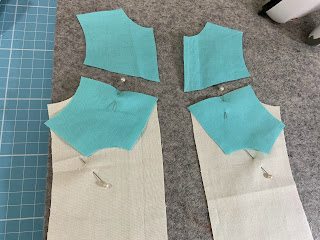
I like to line everything up in the way that it will look when it is sewn together.
This helps me be sure that I will get a left and a right front when my fabric doesn't have a proper wrong side.
Flip the main yokes so they sit on the lower fronts right sides together. Pin and stitch.
Flip the yoke linings so they end up right side towards the wrong side of the lower backs. Stitch.
Press up one yoke.
Then press up the other yoke so the shoulders align and the seams are flat.
Pin the shoulders in place for the yokes and add the trim.
Enclosing the rick rack on the fronts
If you are enclosing piping or rick rack then you will need to sew it to the right side of the main yokes first.
Button Bands
Now, for some reason I kept sewing the shoulder seams before I did the button bands even though I wanted to do the button bands first. Because the shirt is so small, having the back and fronts sewn together at the shoulders didn't make it any harder to sew on the button bands.


No comments:
Post a Comment
Note: Only a member of this blog may post a comment.