 |
| Doll clothes allow so much creativity. I had a lot of fun making this. |
Jarryd Hayne is very popular in Australia and seems to be very popular in the US too. I watched some of the match early this morning and saw Hayne a couple of times. He didn't get much play time but it was great that he set up the chance for San Francisco to score.
I decided to make up a 38 number to put on my doll's jersey. I haven't tried to do the shoulder pad seams and I think they might have 3 stripes on their sleeve but I went with 2 because that seems to be all you can see most of the time.
I wasn't sure whether to make a nightie or a jersey but I went with the jersey this time. I think a red nightie with white numbers and big floppy elbow length short sleeves would look good. I have been watching my MacMillan and Wife DVD's and Sally has a red nightie with 18 on it that I like. I will just use 38 instead.
OK. To the pattern.
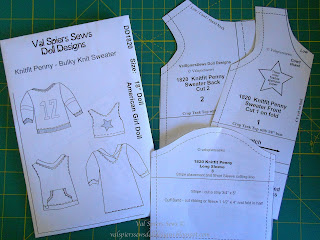
I used my bulky knit sweater pattern. I use the divider pages to file.
The envelope is behind the divider page. (You cut out and tape the envelope together. It comes with the pattern.)
I keep the envelope on my desk while I am using the pattern pieces.
Getting Started
You will need a loose fitting sweatshirt pattern like 1820 Knitfit Penny.
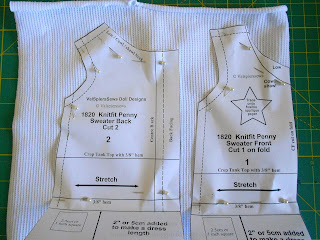
I cut out the low neck front and the low neck back.
I cut the sleeve with the short sleeve cutting line on the fold because I am going to gather up the hem the way it looks on the players. The fold is parallel to the stretch.
To make a V neck cut off a bit of the neckline in front. You can put a mark about 1/2" down the centre front if you need to measure before cutting.
Trace the reversed 38 onto your applique paper and iron it onto some red fabric. Cut it out and iron it onto the front of the jersey.
I don't have a pattern for the V neck band so I stitched the shoulders together and measured the neckline. My neckband is two strips 5 1/2" x 1 1/4".
I placed the numbers 1" below the point of the V and 1/8" either side of the centre front. They melted on pretty good so I am not going to sew around them at all. I just used some red polycotton for the applique. It is quite light but all I had.
- Stitch the shoulder seams.
- Pin the neck band pieces in half. Line up the ends at right angles and stitch a v to hold them.
- Put a dot where the seam allowances cross at the point.
- Put a dot on the seam allowance at the centre front. Snip to the dot.
- Pin one side of the neck in place stretching to fit from the snip to the back edge. I stitch with the bodice facing up so I can see where the snip is. Stitch with a narrow zig zag.
- Pin the other half of the neck band on and stitch. I had to unpick a bit at the centre front to get the V just right. It is a bit fiddly.
- Top stitch close to the seam on the right side.
Sleeves
- Pin the top to secure the double layer.
- Stitch 1/8" from the fold then 3/8" from the fold to get a 1/4" elastic casing.
- You nee 4 x 6" pieces of 3mm or 1/8" ribbon. Stitch two rows of narrow red ribbon on the sleeve. One on the second casing row and one just above it.
- Insert 5" length of 3mm or 1/8" elastic using a safety pin. Secure with back stitching at each end.
- Stitch in the sleeves and stitch the side seams. Because the sleeves are a double layer I off set the sleeve seams at the underarm so it wouldn't be too thick.
Finishing
- Overlock the hem.
- Turn up a 3/8" hem.
- Turn in the back facings 1/2" and stitch.
- Add velcro to the back. I space 3 small pieces of hook and loop down the back.
It looks so cute!
Download the free PDF tutorial with applique number now.
Buy 1820 Knitfit Penny - Bulky Knit Sweater on Etsy now.
Get the pleated skirt pattern and tutorial for free.
Happy Sewing,
Val


No comments:
Post a Comment
Note: Only a member of this blog may post a comment.