Saturday, October 3, 2015

How to create doll clothes from your imagination: Fashion File 19

The Inspiration

I noticed there is a new American Girl Doll with some cute 50's style doll clothes. I really liked her school dress and knew I could make something similar with pieces from patterns I already had.
You can download the text instructions including the narrow collar and a filing divider. See the link at the end.


valspierssews doll clothes

Instructions

If you want to use the lined bodice for this dress you will need to use a fine fabric like batiste because the front has several layers of fabric to create the blouse effect and layers of fabric affect the fit. You will want all your fabrics to be a light weight.

To make this dress I used the bodice back and front from 1804 The 18" Dress combo, the scoop neck front from 1810 Scoop Neck Dress and the sleeves from 1806 Open Neck Blouse. I cut down the collar from 1804 to make a narrow Peter Pan collar. I have put the collar in the free file.


valspierssews doll clothes
I designed a folder divider page so you can print out the pieces and keep them together. I can see myself making several different colour ways with this design.


valspierssews doll clothes
  • The first thing I did was put the two fronts together and trim off a fraction to make them exactly the same around the armholes and at the waist edge.

valspierssews doll clothes
  • Next draw a line 1/2” to one side of the centre front of 1810 front. Place this new line on the fold of the  check fabric so you get extra in the centre to make a pleat.

valspierssews doll clothes
  • Make the pleat in the centre front so the centre of the pleat is in line with the centre front.
  • Stitch the top and bottom to secure the pleat.

valspierssews doll clothes
  • Cut a bias strip of black fabric 2.5cm x 20cm (1” x 8”). Press it in half then press one long side to the centre. Open out and stitch the other long side, right side to wrong side of the neckline. Press the binding up over the seam allowance. Fold it to the right side. Turn in the edge and pin. Stitch the binding down close to the edge.
  • Place the low neck front on top of the 1804 white front. Baste the side edges.

valspierssews doll clothes
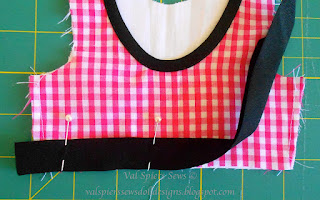
  • Cut a bias strip from the black fabric 3.8cm x 15cm (1 1/2” x 6”). Press it in half. Stitch it to the right side of the front waistline. 

valspierssews doll clothes


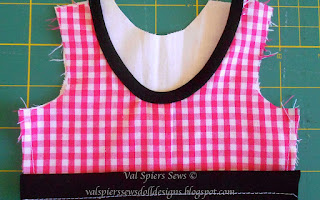
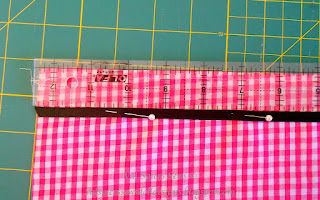
  • Stitch just less than 1/4” from the edge so this row of stitching will not show after stitching on the skirt.

  • valspierssews doll clothes
    • Stitch the shoulder seams. Overlock to neaten and press towards the back.
    • Do the collar from the 1804 instructions. use the back for the lined version if that is what you are doing. Cut out and stitch the shoulder seams of the lining and apply it to the main enclosing the collar. 
    • Use the sleeves from 1806 View 1. I just did a 1/4" hem on the sleeves.

    valspierssews doll clothes
    Skirt
    • Overlock the hem edge. Turn up 1/4” and stitch starting and finishing 2” from each end. 
    • Stitch the ribbon to the skirt 1” from the hemline.


    valspierssews doll clothes
    Finishing
    • Fold the back facings to the wrong side and stitch across them with a 1/4” seam allowance at the hemline. Turn. Finish the hem.
    • Stitch on the 3 buttons.
    • Make a bow for the neck. Stitch it to the front. I tied a short length of ribbon in a single knot, trimmed the ends at an angle and stitched it to the neck with a bar tack. (Zig zag on zero length.)
    • Put fastenings on the back. 


    Happy Sewing,
    Val

    No comments:

    Post a Comment

    Note: Only a member of this blog may post a comment.