 |
| Patterns |
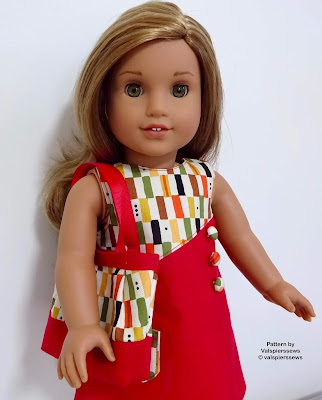
- Making tote bags for your 18" dolls can be a bit hit and miss. If you have a pattern then you don't have the hassle of experimenting to get the right scale.
- Another stumbling point is the length of the handles. With a pattern you don't have to measure and test, just cut out the handles and make the bag.
- Getting the steps done in the right order can also be a challenge. With a set of step by step instructions you can have bags made for any outfit in quick time before you lose interest in accessories.
- Any of the 5 bags below can be a starting point for lots of creative ideas or you can just buy them all and get comfortable with the steps before getting adventurous.
The patterns start with Bag 2 because Bag 1 was created a long time ago and is undergoing some reformatting before it gets relaunched.
So Bag 2 is the flower Tote. I suppose you can call it size 2, with 1 being the biggest. (Bag 1 is size 1)
You can make the unusual button hole strap closure or just make a normal strap.
I'm thinking the daisy addition to the strap could be a heart or a star or a ghost or a spider depending on the theme you want to go with.
Bag 3 is a stylish pleated tote. I was thinking this one might look nice reduced in size a bit. At around 70% the top of the bag is still big enough to top stitch around. I will have to experiment with this. At present it is size 2 on my scale.
Instead of pleats you can also just gather the panel to fit the top piece.
Bag 4 I call the HiLo Tote because you cut the bag main low and the lining high. With the pattern to work from this tote is easy to make and has lots of potential to morph into different variations.
I have even included the pattern piece and instructions to make the variation with the wrap around handles. No calculating or experimenting. Why not take the design and run with it to make pockets that fit between or under the handles in either view.
There is also plenty of space on the front panel to add trims and embellishments and applique.
Bag 5 is the basic bagged tote in size 3 on my scale. Just a bit smaller than bags 2, 3 and 4.
I thought that even though it is a basic design it is still a good place to start when learning about tote bags.
Not just for beginners though, because with a good basic design to begin with you can start creating lots of new designs for yourself.
You can make this one reversible too.
Bag 6 is also size 3 and I guess you could call it a variation of bag 5 but I had to play around a bit to get the scale of the pieces right for the outside panels and also get the handles narrow but not too narrow.
Having a pattern certainly makes it easier to get a great design first go.
In my FB group I have been absorbing all the tips and ideas from the wonderful members. One idea was to add small suffolk puffs to our doll clothes. When I made this bag design I knew the yoyo was going to be perfect.
I have even included the circle as a pattern piece. (There are no instructions for the suffolk puff included but I worked out that you have to stitch around the outside of the circle by hand to get the puff to look right. There are plenty of instructions on line.)
I am thinking that this design will look good with mini pom pom trim in between the panels. You can easily add a small loop for a purse dangle using a D ring for style or maybe cut pieces to make an outside pocket level with the piecing seam line.
What an adventure. I think I can now understand a bit more how my fellow doll clothes makers feel about shoes :D
I couldn't help getting quite excited about the potential of all these designs. I can see bags and purses becoming one of my favourite doll things to make. I have lots of trims and quite a few different fabrics like vinyl and leather that I can play with. Oh! and zips and bag feet and rivets and grommets!
Happy Sewing,
Val


No comments:
Post a Comment
Note: Only a member of this blog may post a comment.