Showing posts with label Applied Doll Dressmaking. Show all posts

Saturday, August 21, 2021

Doll Clothes Sewing Tips - Bias back neck facing


There is always the opportunity to improve your doll dressmaking skills by looking at how others put the designs together. 

I am so grateful for the many doll dressmakers who post on blogs and on you tube and Facebook about their sewing experiences with doll clothes.

Many times I have thought "What an obvious method, how could I not have seen that?".

So in that spirit I am sharing a simple way to neaten the collar seam on a button down doll blouse.

For years I have resisted this method because I had an unfounded dislike of additional sewing or cutting out of pieces.

The couture appearance of this finish far out weighs the extra few minutes to set it up and I have no explanation to why I have left it so long to use this seam neatening method.

So, what is the finished result? Here are some shirts I made for my Summer doll clothes capsule. 1806 is a perfect second layer for the Summer clothes capsule.


And what do you need to do to get that finish?

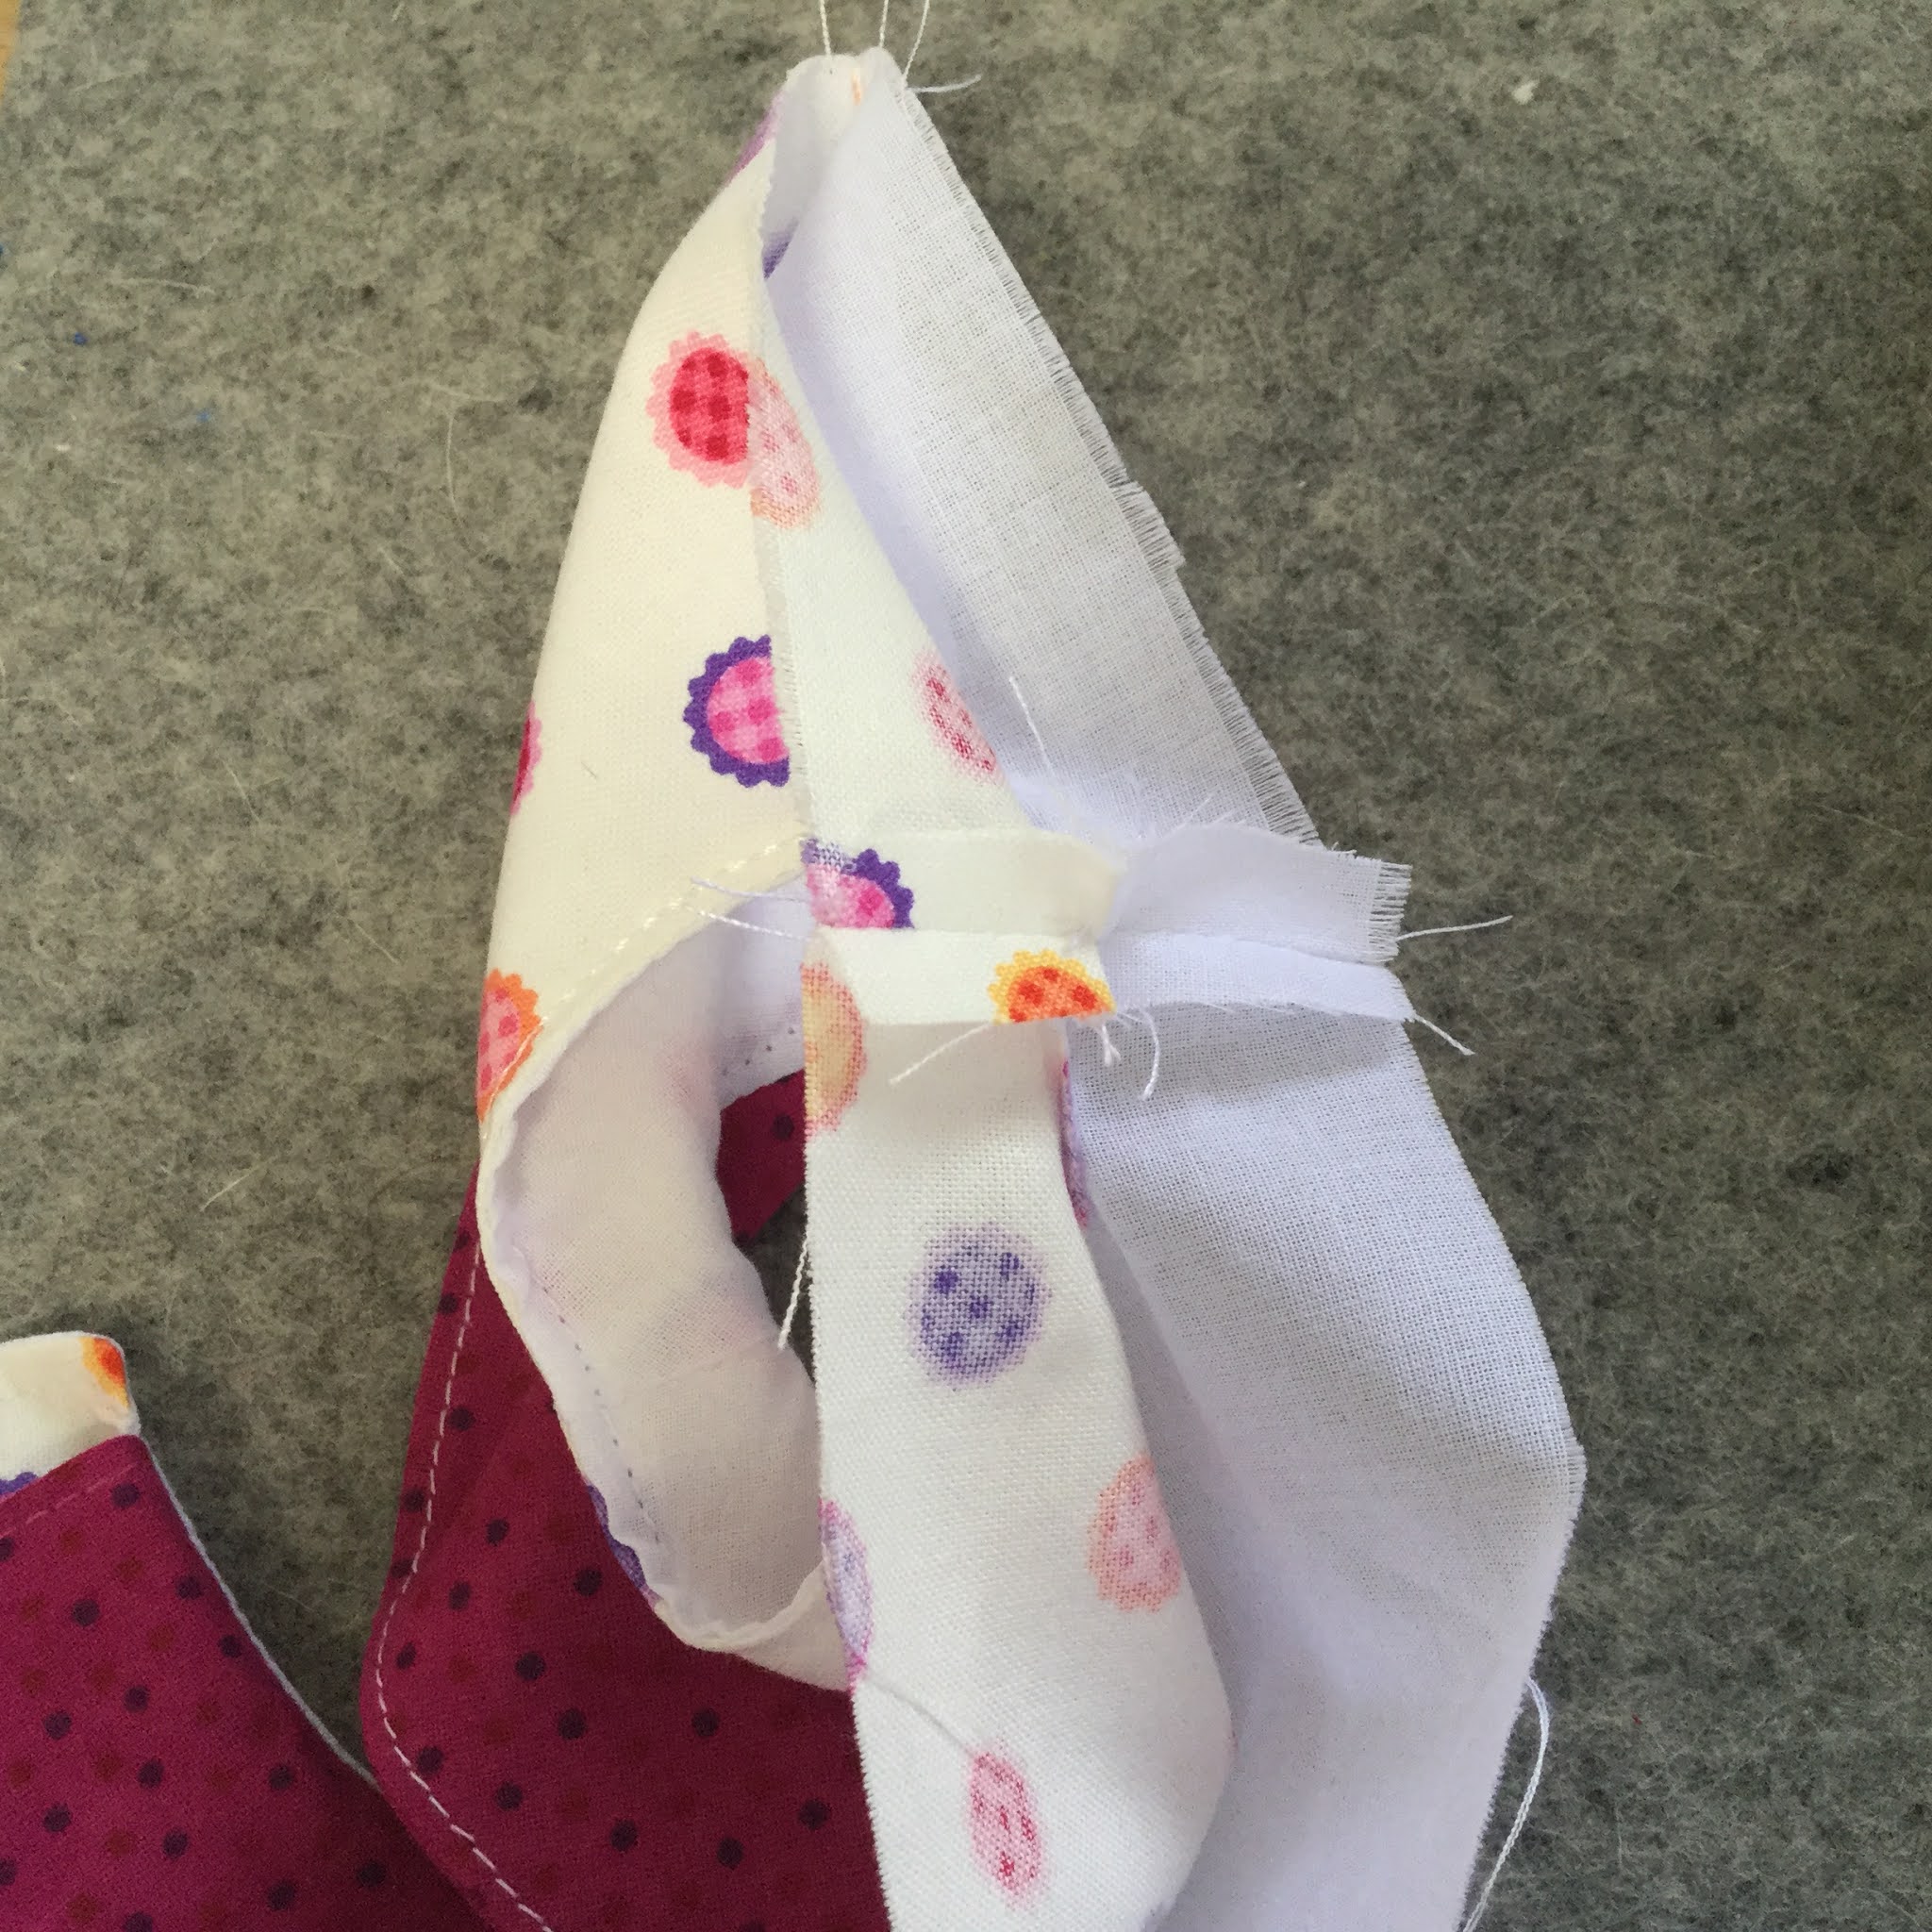
About 4 1/2" of bias strip 1 1/8" wide.

Quite simply, you sew on the collar as instructed then you cut a 1 1/8" wide bias strip that extends about 1/2" into the front facings on each side. Fold the strip in half and press it. Centre it on the collar so the raw edges match the raw edges of the neck seam. Stitch it in place and trim the seam. Press it down over the seam allowance and stitch it down.

All this takes about 5 mins.

I haven't tried this folded bias strip on a round neck blouse yet but that is something I will do when I republish my round neck blouse pattern. At present I am redoing the Open Neck Blouse pattern to include the instructions for the bias facing. Look out for the New! version on Etsy.

You can download the instruction page on creating a bias facing with a collar from my Dropbox.

If you are signed up for my newsletter you can also access it as no.20 in the Newsletter Patterns folder.

Happy Doll Dressmaking,

Val


Saturday, October 24, 2020

Doll dress with a perfect collar and hidden side seams

I am always learning to sew better. Some things I see on other blogs or in Threads magazine. Sometimes I just work it out myself after trying lots of ways.

Doll clothes sewing is not quite the same as people sewing though many things are similar.

Sewing the collar together for the doll dress is only part of the process.


You can download a PDF ebook of this tutorial by clicking below:


Pressing and under stitching are really important steps to make the collar fit perfectly and sit nicely.

Below is a list of the steps involved

  • Make sure you trim the seams back to 1/8".
  • Make sure you clip into the seam allowance around the curves of the neck and armholes - my dress has no sleeves.
  • Turn the bodice and press around all the seam edges with the bodice facing up. Gently pull the collar up and get the point of the iron right up to the seam line.
  • Flip it over and press it again with the lining facing up.
  • Press the collar in place at the centre front.
  • Slightly roll the collar and press it in place at the backs. Not all collars roll like this but I think it looks nice on the doll.
  • Under stitch the collar.


Pressing the Collar after Turning the Bodice

Press with the bodice facing up


Press with the lining facing up


Press the centre front in place


Roll the back a little bit and press each back in place


When it is all pressed the front sits flat and you can see that the back sits ups just a bit as it rolls slightly.


Under Stitching the Collar

Lift the collar out of the way and stitch 1/8" from the neck edge on the right side.


Arm Holes and Side Seams

Below is a list of the steps

  • Top stitch the armholes starting and finishing 1/4" from the under arm edges.
  • Separate the bodice and the lining and print the lining side edges together and the bodice side edges together so they form a continuous seam with right sides together.
  • Stitch the seam and press it open.
  • Fold the bodice and lining back together.

Top stitch the arm holes


Separate the bodice and lining and bring the lining side edges together and the bodice side edges together


Pin to form a continuous seam


Stitch it and press the seam open


Fold the bodice and lining back together and press


Happy Doll Dressmaking,
Val