Sunday, June 19, 2016

How to Sew Doll Clothes - Curved Hems

valspierssews
A perfect curved hem

I am a big fan of the overlocker. I find it indispensable for all sorts of sewing projects except quilting and patchwork.

On my samples I don't even change the overlocker thread to match.
You hardly see it anyway.

If you don't want the overlocker finish inside your skirt then you can try this more labour intensive method.

I read about this method for sewing curved hems for people clothes and thought it would do nicely for flared doll clothes with just a bit of scaling down.

Before you cut out your garment you will need to make sure you have a hem allowance of about 3/4".

I stitched on the waist band. Now I am ready for the hem.


Once you get to the hem step:

  • Stitch around the hem edge 3/8" in from the raw edge with a regular sewing stitch.


  • Press the edge to the inside along the stitching line. Work around with the point of the iron.

  • Stitch again 1/8" from the folded edge.


  • Carefully trim away the raw edge close to the stitching. Slide the scissors behind the fabric. It is easier to do this with the garment on a table. Put some tension on the trimmed off strip with your left hand.

  • Fold the hem over again keeping it as narrow as possible.

  • Stitch the hem.


This method works great with quilting cotton. It will probably work with more difficult fabrics too.


This skater skirt is part of my 2 skirt pattern called Hankie Skirt and Skater Skirt. 
You can find it on Etsy and Craftsy.

If you like my How to Sew Doll Clothes posts why not Like me on Facebook or follow me on Google+ to keep up with my blog.

Happy Sewing,
Val


Thursday, June 16, 2016

Doll Style: The Skater Skirt

The skater skirt is such a cute fashion statement.

It can be bright and saucy.


It can be cute and sassy.


It can be streetwise.


This skirt takes about 20 mins to make. When I made the black one I didn't have any 1/4" elastic left so I made a circle from 10 1/2" of my 1/2" black elastic. I used pins to quarter the waist and elastic then stitched with the darning zig zag stitch. The elastic sits flat on top of the waist.

The skater skirt and hankie skirt patterns come as one file in my shop.


Happy Sewing,
Val


Sunday, June 12, 2016

How to Sew Doll Clothes: Sewing Small Button Holes


This tutorial is for the automatic button hole that uses this button hole foot.


Where do you start?

Study your fabric

The first thing you need to do is decide how to strengthen the place where you want the button holes.

  • If it is down a front or back facing - 2 layers of fabric - you will need interfacing. Attach a strip of interfacing on the wrong side of the facing before sewing your project.
  • Another way to interface is to place non fusible interfacing behind the button hole when you sew it then trim the interfacing away.
  • If it is a folded shirt band like the one in my Boy Friend Shirt pattern the 3 layers of fabric should be enough
  • If it is on a waist band you may need to use interfacing but also make sure the seam allowances are trimmed away from the area of the button hole.

Choose you buttons

See my How to blog post about buttons to help you decide on a size.

Preparation

Stitch width

  • When sewing regular automatic button holes you set the stitch width quite wide. My machine should be set on the widest stitch width of 7.
  • I discovered that setting the stitch width at 4.5 makes each leg of the button hole narrower. I experimented with 4 but decided on 4.5.
  • The button hole is neat at 4.5 and not chuncky looking. It is also wide enough to stop the edges fraying easily.

Guesstimate

  • Unfortunately there is no other way to get the right size button hole than to guess and check.
  • The easiest way to explain how I set my button hole foot is to say that from the closed position I moved the slider 4 clicks.

  • You can't use the button to set the slider because the small buttons just fall out.

  • If you are using a 1cm button you can place it in the foot. If you don't mind this size then it is by far the simplest way to go. You don't have to guess.

Test

  • Once your foot is set attach it to the machine and pull down the stop lever.
  • Prepare a test piece using the same number of fabric layers as your garment - 2 plus interfacing or 3 layers of fabric.
  • Stitch a test button hole. I did several tests.

Cutting the button hole

  • Since the button hole is so small it is best to use pointed scissors or you button hole slasher to make a start at the centre.
  • Use sharp pointed scissors to snip towards each end from the centre. Don't snip too close to the end. Leave a few threads un cut.

Check the button goes through

  • Push the button through to check. Adjust the clicks on the button hole foot slider is needed and do another test button hole.

The Real Thing

The button holes

Once you have done your test and are happy with the result it is time to work on the garment.
  • Position your buttons and put a pin at the centre of the button position on the button band - the doll's left hand side. Leave these pins in while you sew the button holes.
  • Line up the button hole band next to the button band. Line up the centre of the test button hole with the pin and place a pin in the button hole band at the bottom of the test button hole.
  • The button hole stitches from bottom to top so you need to know where to start.
  • In the photo I am working on the cuff. Because it is 2 layers of fabric I pinned a piece of interfacing behind it. I have marked the position of the bottom of the button hole with a pin.

  • It is best to mark all the button holes now then draw a line about the length of the button hole, above the pin, perpendicular to the band. Leave the pins in because it is much easier to see the pin than the end of the drawn line.
  • The photo is of the cuff. I have drawn a line to help me centre the button hole and keep it straight.

  • I say to draw a line because I found that the shirt tended to slide sideways without me knowing and the button hole was off centre.

The buttons

  • Using the pins you had to show the position of the buttons, tape the buttons on and use your button foot to stitch them down.
  • In this photo you can see I had some trouble centring some of the button holes. That is when I decided to draw the line. This yellow shirt is my first attempt at tiny button holes on a garment. They are not perfect yet.

  • The plaid shirt was my second go at button holes. These ones had 1cm buttons and they seem to be a lot neater. I will persevere with the tiny ones. It won't be long before they are perfect.


I realise that I am new to doing small button holes and the photos I took didn't exactly match the steps I finally settled on but they give you a good idea of how they will turn out and I hope that you can see that it is mainly a matter of giving it a go.

Happy Sewing,
Val

Thursday, June 9, 2016

Published - 2033 Boy Friend Shirt for Australian Girl Doll


valspierssews doll clothes
The perfect flannie shirt for Emily

I was so pleased with how well this design converted to the 20" size. Maybe I am just getting better at drafting the 20" pattern from the 18" pattern. I have gained a bit of a feel for what is required to tailor the fit for the Australian Girl Doll over the last year.


I was going to hang onto this pattern until I made another sample but it was obvious that the fit was perfect and the instructions are the same as for 1833 so I have just put it up.

Just a couple of differences. I didn't include the cut in shoulder pattern because the Australian Girl Doll shoulders are narrow compared to the AGD so it didn't seem a worthwhile option. However, it will be easy to taper the armhole from the under arm to the seam line at the shoulder to get a cut in affect if you choose. Just start halfway up the armhole and taper to the dashed seam line at the shoulder.


I have also included a pocket pattern in the 2033. Pockets are such a pain on the smaller 18" design. I haven't included instructions for the pocket but there is a placement guide and it is pretty straight forward.

Also with the collar. The AGD needed a narrower collar for the tie but the Australian Girl Doll has a different neck so she just has the one collar pattern.

I will get around to making some more samples soonish and will add the photos to Facebook and the pattern listing. I have plans for a white shirt and I guess I should make one with the contrast button band and collar and cuffs.

Meanwhile, the girls are just hanging out.


You can purchase this pattern on Etsy in USD or on Craftumi in AUD.
The Craftumi prices will stay the same regardless of the exchange rate.

Happy Sewing,
Val


Doll Style - The Everyday Shirt Buttoned Up Doll Clothes Pattern

Button down doll clothes shirt pattern to fit 18" dolls like American Girl Doll by valspierssews
Lea out shopping in her Everyday Shirt

The everyday shirt is so easy to make. If you want a nice shirt that looks as good as the Boy Friend Shirt but is much less fiddly to sew this is the pattern to go for. It is Pattern 1837 Everyday Shirt .

Today's first outfit is the everyday shirt teamed with skinny straight jeans. The shirt is made in pink polycotton gingham and the jeans are made with a pale pink linen. I was going for a 12 year old pony club look. The pink check has a very country look.


The next variation has fancy boots and the shirt tails out for a casual day at the country show. She could be a 12 year old or a 17 year old in this outfit.


The final variation with the pink check has a 17 year old Lea hitting the shops on Rodeo Drive.


The second outfit has the everyday shirt done in a red and navy plaid and I have teamed it with dark crop jeans. As with the pink gingham this plaid pattern gives the outfit a casual look.


Because the shirt hangs below the waist you can team it with any pull-on trousers. They don't have to be fancy jeans.

I don't have a big wardrobe selection to go with the plaid shirt. I like this dolman top (I don't have a pattern out for this one yet). It goes well with a skirt.


I sell my patterns at  dolldressmaking.com for my Australian and NZ customers and Etsy for my European customers. US and Canadian customers can go to either shop.


Happy Sewing,
Val

Monday, June 6, 2016

Published: 1833 Boy Friend Shirt

Doll Clothes
The Boy Friend Shirt

What a cute pattern this is even if I say so myself.

Great detail with a separate collar and stand and a proper shirt sleeve placket. Just follow the step by step instructions in the Pictorial Tutorial and the placket is a snap. You can also use the Photo Tutorial for extra insight into the placket. There is a link on the Title page.


Play the little movie to see what is included in the pattern file.


I recommend nothing heavier than quilting cotton for the shirt but if you want to try something thicker you should enlarge the pattern to 102%.

I have priced this one at $3.00 US because it was quite tricky to draft but I will be publishing 2 more versions. One will be the Everyday Shirt with a single piece collar and a more simple placket. The other will be a Fashion Shirt with that classy fold to cover the buttons and big bishop sleeves. These will both be $2.50 US and the pieces can all be interchanged depending on the details you want.
2033 for the Australian Girl Doll is not far behind.


Available on Etsy now


Happy Sewing,
Val

Sunday, June 5, 2016

How to Sew Doll Clothes: Sewing Small Buttons on Doll Clothes

When you sew lots of buttons on doll clothes you want an easy and fast way to do it. If you don't like hand sewing you want a way to use your machine for those tiny buttons.

I sew doll clothes for 18" dolls and 20" dolls.

Selecting Your Buttons

Size

  • Choose small buttons to suit the scale of your garment
  • I use 6mm (1/4") buttons most often
  • I have also used 10mm (3/8") buttons on garments for the Australian Girl Doll (20")
  • 12mm (1/2") buttons are just a bit too big but you could easily use them on the back of a dress.
6mm (1/4") buttons on the shirts for the 18" doll

10mm (3/8") buttons on the shirt for the 20" doll

12mm (1/2") buttons on the 20" and 18" shirt.

Comparing the size.

Colour

  • The choice of colour determines if your buttons show up or not
  • Generally if you are going to the trouble of putting on tiny buttons you want them to feature
  • On the plaid shirts above the red buttons stand out much better than the black buttons
  • You could use white buttons on the pink check shirt to make them show up more
  • Sometimes you just have to use what you have

Amount

  • The smaller the button the more you can fit on obviously
  • How far down the opening you go can affect the look. You might also want to leave the waist button free for skirts to fit around the waist better.


Spacing

  • I like the look of lots of buttons closely spaced as on the pink check shirt
  • These ones are spaced 2cm (3/4") apart
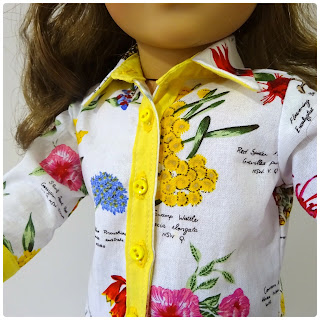
  • On the floral shirt I made button holes and didn't want them to be too crowded but I probably could have spaced them for 5 buttons rather than 4
  • The spacing for the floral shirt is 3.2cm (1/14")


On this shirt for the Australian Girl Doll (20") the 10mm (3/8")  buttons
look good with the 3.2cm (1 1/4") spacing

Prep

  • Use small strips of sticky tape to secure each button
  • Try to keep it away from the holes
  • To attach the tape lay the button on the table then stick on the tape. List the button and put it in place on the garment.

Prep Update

6 years later and I have made some slight changes to the buttons prep.
Now I lay all the buttons so the holes run from top to bottom rather than sideways.

I still use sticky tape but I put one long strips over all the buttons.


I sew them on one at a time still but I can now work sideways. This stops the buttons getting in the way of the foot.

Sewing

  • Attach your button foot
  • Set the stitch width to zero
  • Select straight stitch to start
  • Adjust the width so the needle goes down into the left hand hole.
  • Make several stitches to tie off. Lift the needle.
  • Switch to zig zag stitch and crank by hand until the needle goes into the right hand hole. You may need to adjust the width a fraction.
  • Stitch side to side 3 or 4 times. Lift the needle.
  • Switch back to straight stitch and make 2 or 3 stitches to tie off.
If you have several buttons just move to the next one and do it again.

Buying Buttons

I have bought buttons from my quilt shop and from Etsy shops.
My quilt shops don't always have what I want so I shop on Etsy more often.

The shop I bought these buttons from doesn't sell much any more (April 2018)


These 6.5cm buttons look great. They are not exactly cheap but then again they don't look cheap. They are thick and sturdy and easy to handle.


These 6mm buttons are very thin but also very cheap. They are great for using lots of on my sample items.
They are still quite sturdy and easy to sew.


I would love to hear from other doll clothes makers who have any good ideas for sewing buttons or maybe a good button supplier to share. Also feel free to ask questions.

Finally, I had a go at making a video of sewing on my buttons. It is not perfect but I guess that just makes improvement easier :)


Happy Sewing
Val