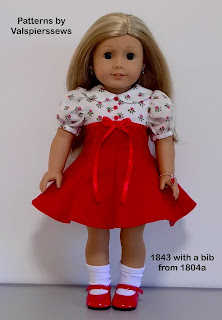
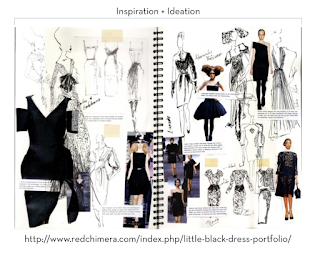
Don't you just love ruffles! All the Princess Line Dresses are perfect for adding ruffles or trims and ties. If you have an 8 panel dress pattern it shouldn't be a big leap to draft some of the designs below.
- You can make the two centre panels into one
- You can split your single front panel down the middle and and create a button down front by adding a front facing
- You can reduce the flare so it looks more A-line as well as add more seams, gathered sections, colour blocks.
The 8 panel style offers great potential for many different looking designs. If you are interested in discussion on designing and drafting please come along to my Facebook group.
Dresses with 1 Central Panel
Some of the princess line designs only have three panels in the front. What I would do to make the two front panels into one is trim the seam allowance off the centre front seam line on the pattern pieces. Then lie them up together and work out what needs to be done with the centre flare. You don't want to just cut it out all together because it will change the shape of the dress front but not the back.
I suggest cutting some of the flare out of the centre front then increasing the flare on the sides of the centre panel as well as increasing the flare a fraction on the side panels. Fold the new centre panel in half and cut the neckline how you want.
You can make some styles like this:
1940's
Dresses with a Button Down Front
If you want to create one of the variations that has buttons all down the front. I suggest that you cut a front facing piece using the front piece as a guide. Just don't forget that you need to overlap the fronts this time so you need to add 1/4" to extend the centre front piece at the centre front seam only. Copy it then use the copy to create the facing.
I really like the ones with the scalloped fronts.
Here are some examples of button down versions:
 1940's 1940's |
| You would need to keep the back opening for this one and add extensions for the front placket. |
Many of the A-line designs from the 60s use the princess line.
It is probably easier to use an A-line dress to create the panelled A-line designs. You can use the curved side seam of the princess line dress 1843 to shape the A-line in at the waist a bit if you like.
This one looks like it shapes in at the waist. You can do the top part of the bodice with an add-on yoke rather than sew it as a seam.
This one also shapes in at the waist just a bit.
This one is a simple A-line with straight panels. Not princess line because it doesn't shape in at the waist but the panels look great.
There are also variations that have an extra piece as a yoke at the top and gathers below. It wouldn't be too hard to cut the centre panel then add 3 or 4 inches to the centre front edge of the panel.
From what I have read, you draw the grain lines of the panel perpendicular to the Centre front and centre back lines. In the next instalment I will be showing you step by step how I create one of these designs from dress pattern 1843.
See Part 1introducing the Princess Line, and
Part 3 a tutorial on how to vary pattern 1843
See Part 1introducing the Princess Line, and
Part 3 a tutorial on how to vary pattern 1843
Happy Doll Dressmaking,
Val


