Showing posts with label Doll skirt. Valspierssews. Show all posts

Wednesday, April 4, 2018

Custom Creation Doll clothes by Valspierssews

Use my Designing without Drafting method to make Custom Creations with a Fabulous Fit.

I have been saying how easy it is to create your own designs using my patterns because it just is.
Here is the cute school dress I put together using fashion elements from various patterns.


You can read about it here

The latest variation on 1827 bodice is a square neck. I haven't tested this out yet so fingers crossed it looks great. I plan to combine the bodice with the pencil skirt from 1828. I will be using the blouse as is from 1827 to go under the dress.

I'm still testing out the square neck pattern piece but when you make your own creations you will be using pattern pieces that you know look great from other Valspierssews patterns.

There are lots of sleeve variations across my designs and they can be used with almost any other pattern. The same with the skirt styles and there is a growing number of bodice styles too.

How you can do it:


  • Print out a blank envelope with the doll outline on it.
  • Draw up your design from your head or a picture you have.
  • Choose patterns that have the fashion elements you are after.
  • Print out a new set of the pieces you want.
I will be posting a link to the envelope soon.

If the square neck dress looks good you will be able to download the square neck variation soon too.


Print out a blank envelope with the doll outline on it.
Draw up your design from your head or a picture you have.


Choose patterns that have the fashion elements you are after.

Print out a new set of the pieces you want.


Print out a new set of the pieces you want.
You will be able to keep all your new designs neatly stored.
When you sign up to receive my newsletter you won'y have to worry about missing any free content upgrades because I always put links to the blog posts for that fortnight in the newsletter.


Happy Sewing,
Val

Sunday, February 4, 2018

Gathered skirts are perfect for dolls: Part 3 - Elastic casing photo tutorial

valspierssews

Last night I looked up some summer fashions at target online. There was a little chambray skirt that looked cute.


Sometimes it is nice to have a place to start. However, I didn't have chambray and I didn't feel like doing embroidery and tassels were just beyond the scope of my Sunday fun. But a skirt I could do!

If you want to make sure you don't miss any of my tutorials you should get my newsletter. Just sign up in the side bar.

For this cute little skirt you need:
  1. a fat quarter of light fabric.
  2. 25" of trim
  3. 10 1/2" of 1/2" elastic
  4. a shoe lace


I folded my fabric over 6 1/2" and cut 2 skirt pieces and 2 waistband pieces.
You can make pattern pieces.

My elastic is 1/2" so I calculated the width by adding
1 x 1/4' seams, 2 x 1/8" casing stitching rows and 5/8" for my elastic.
You then multiply by 2 for the width. Recalculate if you want to
use 1/4" elastic and make the skirt longer.

This is a short skirt. It could go 1/2" longer I suppose.
The other option is to use 1/4" elastic then you would need to add
1/2" to the skirt to keep it from being too short.

Of course you can make the skirt in one long strip for the skirt and the waist band but I don't always have that much fabric in one piece.

Stitch one side of the skirt.
Overlock the seam and the hem edge.
Press up the 1/4" hem.

Sew on the trim about 3/4" above the hem fold.
Press.

Stitch the other side seam and overlock it.
Turn the skirt inside out and stitch the hem.
Press.

Stitch one side of the waist band.
Press the seam one way and press up 1/4" on the bottom edge.
Stitch the other side seam and press it the same direction as the other seam.
Re-press the fold.

Attach the waist band to the skirt by placing the unfolded 
edge rights sides to the wrong side of the skirt. 
Pin it and Stitch.
Trim the seam.

Press the waist band up with the seam.

Fold the waist band over to the right side of the skirt and line up
the folded edge with the waist stitching line.
Stitch it down close to the fold leaving a 2" gap near a side seam. 

Press the waist band.
Stitch another row 1/8" from the first, leaving the gap open.
Stitch a row 1/8" from the top fold, all the way around.
Use a safety pin to insert the elastic going in the direction that you pressed the seams.
Pin the end about 2" before it disappears.

Overlap the elastic ends about 1/2" and zig zag together.
Ease it back into the casing and stitch the gap closed with two rows of stitching.

Cut 6" ends off a shoe lace. You could probably cut a bit more. Mine was only just long enough.
Overlap the cut ends and zig zag them to the centre front of the band.
Tie a half knot then tie a bow.
Another option is to cut a 14" piece of string. 
Stitch the centre to the band. Tie a bow. 
Then tie knots in the ends.


Hope you like this one. She is wearing it with the 1806 Open Neck Shirt that comes with lots of variations.


Happy Sewing,
Val

P.S.
Sign up for my newsletter so you will always get links to my tutorials without having to remember to look for them. This skirt comes with printable instructions and ready to go pattern pieces. It is no.21 in the newsletter folder.


Tuesday, August 8, 2017

New Baby Doll Dress Pattern

valspierssews doll clothes

I have just published a new baby doll pattern made to fit Baby Born dolls. It is a version of the 18" Dress 1804.
I thought the baby looked cuter with short sleeves rather than long sleeves so the pattern has 2 kinds of short sleeve. The gathered elastic design and the puffed short sleeve with a band.
There are also two collar styles - pointed and peter pan.


The bodice is lined so you can easily swap styles from collar to no collar and from sleeves to no sleeves.


The sleeve with the band allows you to make all sorts of dresses with contrast sleeve bands and collars for different looks.

The pockets give you more opportunity to add some contrast. you can have them match the collar and sleeve bands or just make the pockets in a contrast.


I have tailored the pattern so it fits the baby doll neatly if you make the dress in shirt fabrics or quilting cotton. If you want to use something like velvet I recommend that you print out the pattern at 102% to give some extra ease. Make sure you label it somehow so it doesn't get mixed up with the 100% pieces.

My latest patterns and any that I update from now will have instruction diagrams with the right side of the fabric shaded so it is easier to read the diagrams.

As with all my patterns you get vector drawn pattern pieces that I draw myself using Adobe Illustrator.

You also get a coloured title page so it is easy to tell what the file is. The title page shows as a little preview on most computers. There are links to my facebook page and my blog as well as some photo tutorials to help with the dress.


There is not too much colour on this page so it is possible to print it out but I usually start printing from the second page. This is a black and white title page suitable to use as a divider page in a folder.

The instructions and pattern pieces follow then the last two pages are the pattern envelope that you can cut out and tape together. I usually put the divider page in a plastic pocket then put the pieces in the envelope and put it behind the divider page in the pocket.
When I want to use a pattern I take out the envelope while I use the pattern. It is then easy to put it back in the right place in the folder because the divider is still there.

See this latest pattern plus all my other 18" doll clothes patterns in my Etsy store.


Happy Sewing,
Val

Saturday, September 10, 2016

Doll Style: An A-Line Skirt


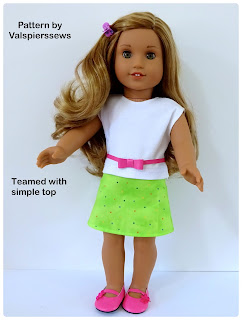
It has been a while since I posted a free pattern. This cute A-line Skirt is available on my Facebook page only.

It was quite a design challenge to get her little bottom to fit in neatly without any tricky design elements like darts or extra panels.

Here is the end result. I guess it is not really the end, because there are still some possibilities to be explored with this simple pattern. I will be making some over the next few weeks while I also work on a request. I will post updates of the request design progress on Facebook.

The sailor suit doesn't need to be old fashioned.


Short and sweet

A longer length for travel comfort.

Neat waistband. Closes in the back with velcro.
The denim look is so versatile.
Look out for posts about how to add a box pleat and how to do a seam and placket in the back and how to add pocket features.

Box pleat in the front.
You will have to visit my Facebook page to get the pattern. While you are there I hope you decide to like my page and also share the skirt pattern with your Facebook friends.

Happy Sewing,
Val