Showing posts with label 1810. Show all posts

Thursday, March 29, 2018

Spring Dress for my 18" Doll

valspierssews


I was really happy with the concept of this spring dress. After I made the Easter dress I realised I needed a few changes to the design. The fit was perfect because I used pattern pieces from other Snugfit Range patterns. I have designed them specially to be swapped around so you can create favourite designs you see for little girls or easily create your own custom designs.

Based on the things I noticed with the Easter dress I have;


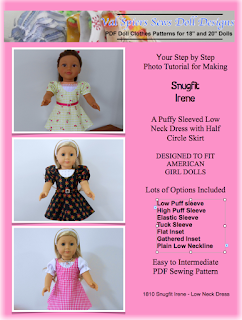
  1. Used the narrow peter pan collar from 1804
  2. Used a floral pattern without an obvious design that will be affected when I pleat it
  3. Made the growth pleats 1/2"
  4. Made them look closer together (by making them wider)
  5. Made the ties from a strip that I folded in half.
  • One more thing I did was go back to the narrower sleeve band that is in the 1810 pattern. I just think it looks a bit daintier than the wider band I created for the Easter dress.

I have to admit I would call myself awkward when it comes to trims.
With lace I have trouble choosing the right sort and deciding where to put it.
With braid I have trouble with scale and colour.
I consider myself great with buttons and pretty OK with ribbon so I use buttons a lot and ribbon bows at the neck or ribbon stripes.

The growth pleats don't show up in the photo very well.
They look nice in real life.

The only thing I think I could have done different on this dress is to have used a narrower rick rack around the collar so it would sit better.


I love the improvements I made  and think I will be doing more designs with that sleeve. There are a few more things I can try with that particular shape. 


If you like this dress design you can make it for yourself following the instructions I will post in a few days. I just need to get the Fashion File kit ready for the shop. The kit is a great way to file the design in your collection but the DIY version is a great way to get a new design for free if you already have 1810 and 1804. You can buy these two patterns in my shop.

Happy Sewing,
Val

P.S.
In the post with the instructions I will include free skirt pattern pieces with the growth pleats. I am experimenting with some automatic emails and signing up to get the free things I offer on my blog. Each free file leads to its own mailing list so even if you already get my newsletter you will need to sign up to get the free file offered on any of my blogs of late. When I do something else with the pattern related to the free file I will send out an email to that particular list. 

As I work on the automated emails there will end up being 3 or 4 emails after you get the free file suggesting new ideas or suitable patterns to combine with it and the like. As usual, you are free to unsubscribe at any time.

I love designing these marketing actions almost as much as designing the doll clothes. It certainly works the mind.

Cheers,
Val

Tuesday, March 27, 2018

5 Things You Need to Know When Designing an 18" Doll Dress

Valspierssews

Valspierssews patterns are great for mixing around fashion elements to get different custom looks. But not everything is meant to go together.
I used the regular collar from 1804 instead of the narrow collar not even thinking about the collar touching the sleeves. It was also my first go at growth pleats. However, I knew it was going to fit perfectly because all the patterns in the Snugfit range use the same basic sizing. I'm just being a bit picky because one day I will put this design in my shop as a Fashion File.

Valspierssews


I have learnt some great tips while creating this one that can be applied to all sorts of custom dress designs.

  1. Use a narrow collar when you have very puffy sleeves or don't use a collar at all.
  2. Don't use growth pleats on fabric that has faces or images of cartoon characters or people.
  3. Make your growth pleats more than 1/4".
  4. Make your growth pleats close together.
  5. Make the ties for the waist from a strip folded in half so it is double sided rather than a single layer strip with rolled hem edges.

You can see how the collar bumps on the puffy shoulder of the sleeve.


You can see how the rabbits have their faces shortened. The pleats just look a bit too narrow for the skirt. They also seem to be a bit too far apart.


The sash is difficult to tie so the wrong side doesn't show. This would be OK with most plain fabrics.

When I make the next dress in this style I will be applying the things that I learnt from the bunny dress. Once I get it perfect I will be putting up some instructions so you can have a go at making it for yourself. It uses pattern pieces from 1804 and 1810. The skirt with the growth pleats is new and I will be putting up the measurements for that when I am sure it is just right.

In the mean time you might like to make a dress like this one using the same sleeves from 1810 and the pointed bib from 1804a. It uses the skirt and bodice from the lined version of 1804.


Look out for the next blog post featuring my improved design.

Happy Sewing,
Val

Sunday, April 17, 2016

Adding Lace to a Sleeve Band for Doll Clothes

I am always trying out new ways to use a pattern. While updating 1810 I decided to add some lace to the sleeve bands as well as using lace instead of the bib insert.

Trouble is, every time I do something different it means I have to explain what I did if I want to use the sample garment to sell the pattern.
Rather than put more instruction in the Pictorial Tutorial I have put some photos in this blog post and made a link to it from the cover page of the pattern.

The Bib
Pin the lace in place. Stitch around the neckline.


Trim the ends of the lace.


Done.


The Sleeve Bands

Stitch the right side of the lace to the right side of the band
with a 1/4" seam allowance.


Turn under the edge with the lace. 
Just the same as if you had no lace.


Fold the band in half to cover the seam allowances.
Stitch close to the lace edge to secure.
The same as if you had no lace.


This particular dress is made with velvet. I didn't think it would be too thick but the extra thickness took up all the ease in the design so it was a tight fit. 
I recommend that you print the pattern pieces at 102% if you want to use a thicker fabric. The design is for light weight fabrics like quilting cotton or poly cotton shirting and rayon.
I want to try a version with sheer sleeves one day. 

There is a pattern piece for the bodice with a scoop neck but it doesn't need the bib insert. I just thought it would be a nice addition.

Happy Sewing,
Val


Thursday, June 18, 2015

New Pattern 1810 Snugfit Irene Low Neck Dress

I am so glad I have finally put this pattern together. There are quite a few looks that can be created with this design. I had to settle on ones that suited the fabrics I had.

Views 1 and 2 illustrate the different size puffy sleeves and the skirt variation. View 3 is a completely different look with the elastic sleeves and inset in a contrast fabric.
I think it would also look great with a black velvet bodice, red skirt and white sleeves and inset. Or maybe in black dupion silk with a lace inset. Or a crepe dress with matching coloured chiffon long sleeves. 1804 Snugfit Carol has long sleeves you can use.


I have also included a tucked version of the large puffy sleeve and a low neck that doesn't need the inset piece. You now have another skirt option with the half circle skirt that is in this pattern. I have also marked the peplum hemline.

I can start to see my vision of mix and match pattern pieces being used to make almost any design starting to come into being now.

I am constantly pulling out different pattern pieces to either make a new pattern or create a design I have seen and I love how easy it is to keep the pieces in order or find just what I want in my folder system. Each pattern has its own divider page and envelope. This means I can take out the envelopes to keep track of the pieces and know exactly where they go back in the folder. Any Fashion Files relating to a pattern I put next to the original pattern.


As with all my patterns, the format is landscape, making it perfect to read on the screen. I had a request from a lady who said she didn't have a computer to use in her sewing room so I have started including a text only version of at least the main view so it can be printed out easily.


The pattern pieces are vector drawn using Illustrator and I include the 1" or 2.5cm square for a scale check. I had a few questions about printing so I have now included a chapter on how to print at 100% in Adobe Reader.


I am always looking for ways to improve the patterns either in general or a specific pattern. I decided the neckline on the 1804 Snugfit carol Round Neck Dress needed to be just a fraction lower so I redrew the bodice and collar pieces and sent out the updated pattern to all my customers who had already bought the pattern. I updated the pattern number to 1804 on all the pieces and extras and the bodice neckline has printed on it 'updated neckline'. You need the updated neckline for the Add-on Bibs I am publishing soon.

Visit my Etsy shop to pick up this latest pattern 1810 Snugfit Irene Low Neck Dress for just $2.50 USD.

This time I have put together the pattern tester dresses for sale as well. The clearance price is just $35 USD with free postage in Australia and discount postage of $10 USD for USA and Canada.


Happy Sewing,
Val