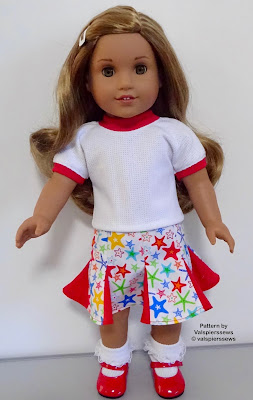
Showing posts with label Doll skirt. Show all posts

Monday, April 8, 2019

How to sew a doll skirt for 18" American Girl dolls

valspierssews

While researching and sewing for the doll skirts blog posts I came across this old post. I have updated the post. I thought it would also be a good time to revisit the free apron I included in the newsletter last year. You can find it in the Doll Accessories Section in the Free Resource Library

Skirt Length

The skirt looks best with the waistband a bit above the waistline. You need to add 1/2" to each of the skirt lengths listed. 1/4" for the waist seam and 1/4" for the hem. Finished skirt lengths that I like are:

4" for a cute dolly look. (high gather for a Betsy McCall look)


5" for a nice party dress or day dress and a more demure look.


7" for midi skirts and a casual look. (at least mid gather)

9" + shoe height for ankle length just above the floor. (at least mid to high gather)

9 1/2" + shoe height just skims the floor. (at least mid to high gather)

Remember, you need to add 1/4" or 1/2" for the waist seam and 1/4", 3/8" or 1/2" for a hem.

Skirt Width

There are 3 widths of skirt that work well depending
on how much gather you want. I have also found that 
the longer the skirt the more width you need to get 
the right look.

Short skirt/low gather 24" wide

The 4" skirt and the 5" skirt are as long as I would go when using a 24" width for gathering. This little blue skirt is cut in 2 6 1/2" wide pieces that i stitched at the side seams. You can see how to make this skirt HERE


Knee and just below/mid gather 30" wide

This is my usual skirt length and skirt width. I find that 36" for a knee length skirt is just a bit too flouncy. My 1804 pattern has the skirt pattern pieces for the front and the back so you can fit it onto a fat quarter. A 30" gather means you save 6"on trims too. 

*************

Doll clothes patterns by valspierssews
Just one of the many variations for 1804 dress pattern

Long floor length/high gather 36" to 40" wide

The longer the skirt the wider you want it to be at the hem. Floor length skirts are OK at 30" wide but 36" is better.

This dress pattern along with the princess dress are not published.
I took them down to rewrite the instructions. They will go back up one day.

Long floor length/super high gather 50" wide (Not for the faint hearted. You have to pull up the fabric as much as it goes to get the right width.)

I have only tried 50"once. I used satin fabric for a princess dress and had so much trouble trying to pull it up enough. The gathers also create a lot of thickness so I had to make my waist band about 13" to get it all to fit on the doll. I ended up not liking the skirt as much as the one on the witch.


If you want to make an economical, easy to sew, great looking skirt go for a 24" x 5 1/2" rectangle with a 12" to 12 1/2" Waistband. If you want the skirt and waist band to overlap by a 1/2" you need to fold your fabric to mimic the waist band then wrap it around the doll and any shirt you want to tuck in. The overlap needs to be 1". You can see how I check the waist band length HERE

Waist Band Ease

The wider the skirt (more gathers) or the thicker your fabric the more ease you need in the waistband.

A cut length between 12" and 12 1/2" fits on a 30" gathered skirt so the skirt can be worn over a shirt or t-shirt. Check that the cut length fits around your doll and any tops to tuck in, with a 1" overlap. The super high gather waistband is 1" longer at 13".

The thickness the fabric you are tucking into the skirt also has to be considered. A T-shirt needs more ease than a lawn blouse.
An all purpose 12 1/2" waistband will be my "go to" waistband for my skirts now because I like to mix and match and never know which tops I want to tuck in or how much underwear she will have on. The width is a matter of taste but 3/8" to 1/2" finished width is a good look.
Remember that thicker fabric requires a longer and a wider waist band.

Free Patterns

You can add to your skirt experience by downloading a free apron accessory pattern from the Valspierssews Resource Library


An apron is a perfect accessory because you can create cute, whimsical, romantic, vintage, cooking or themed outfits by just adding an apron in the right fabric.

(The link is to a bundle. I am still testing out the Teachable site. If you have enrolled in the separate sections I am not sure that enrolling in the bundle is necessary. Get onto me at valspiers@dolldressmaking.com if there is any problem or confusion.)

Find your free apron pattern to download in the Doll Size Accessories section of my Free Resource Library.


Happy Doll Dressmaking,
Val

Sunday, March 24, 2019

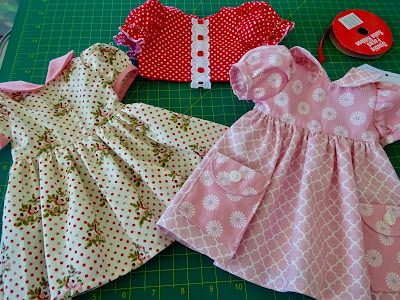
Gathered skirts are perfect for dolls: Part 2 - How to make your own pattern and Free 14" skirt pattern


Please share this great pattern by Pinning the image above or sharing on FB.

Gathered skirts are a quick and simple garment for any doll.

If you have a skirt or dress that fits your doll you can make a pattern for a gathered skirt.

  • Measure the circumference of the skirt hem
  • Measure from the place you want the finished skirt to start and end. Just above the true waist (narrowest part of the torso) down to just above the knee.
  • Add what is needed for the type of casing you want. 
  • Add what is needed for the hem you want.
  • Measure the elastic around the waist of the doll dressed in a top that will tuck in. The ends of the elastic should just meet.
I have been experimenting with the skirt for the 14" Glitter Girl Doll. I trust it will fit the 14" Wellie Wisher Doll.
Even knowing the 5 steps above there is some trial and error involved. 
  • I tried several different ways to gather the waist
  • I tried several different types of elastic
  • I had to adjust the length a couple of times to get it looking just right.
  • I also found that for the smaller doll the hems and trim made the skirt stick out too much because they made the hem edge to stiff for the length of the skirt
Because I am a designer I like to experiment and see what affect different variables have on the finished garment.

I want to share the latest project with you.


It is a gathered skirt with an underskirt and a top skirt. It has two layers of netting for the underskirt that stick out below the top skirt by about a 1/2". The top skirt has a 1/4" hem and is made from light weight woven fabric that is not too stiff. Patchwork cotton works well.

I stitched the two layers of netting right side up on top of the right side of the top skirt using a 1/4' seam. I didn't trim the seam allowance.

I folded the layers so the seam was enclosed then stitched the casing rows.


It is easy to thread the elastic from CB to CB across the waist edge then you just stitch the CB seam.

If you would like to have a go making this skirt for your 14" doll I have created a new item in the Fashion File and Patterns section of my Free Resources on Teachable. You will have to sign up or sign in if you are returning. 

You get the pattern and a photo tutorial.


If you are new to Teachable, when you sign up I will transfer your email to my mailing list. If you decide you don't want my newsletter it is easy to unsubscribe. However, you will stay signed up to access the Free Resources.

Over the next few months I will be tooting my horn about the amazing sterling silver earrings that I design and my husband hand crafts by cutting out the shapes from silver sheets.
I have just set up another Etsy shop called AussieHandmade.


Even if you don't want to buy earrings I hope you will go and have a look and favourite the shop or a few items. They are really well made but I think he is a bit nervous about putting them out there.

Don't forget: 


and


Friday, January 4, 2019

The HiLo skirt for 18" dolls

HiLo skirt doll clothes pattern to fit 18" dolls by valspierssews


HiLo skirts are a feminine style perfect for light soft or crisp fabrics.
Quilting cotton in pretty floral or patterns with small images are perfect. I have some rayon that I am going to try too. Rayon is very soft and drapy so should give a different look.

This black and white design is a composite of several patterns. You can also use a square neck or a v-neck. The sweet heart neck is the bodice front of 1863 rompers (The rompers pattern is getting some formatting done to the instructions for a little while. It will be back in the shop soon)


I took this pattern out of the shop to make few improvements and now it is back and ready to go to work giving new life to old patterns by adding it to dress bodices from other patterns.

The skirt with a cute top is perfect for stepping out.


You can find the 1849/2049 skirt in my shop.

Happy Doll Dressmaking,
Val

Saturday, July 21, 2018

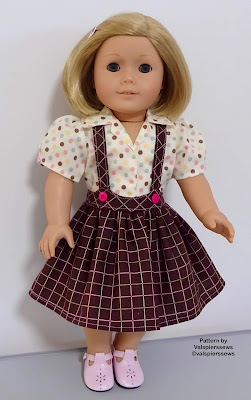
1883 High Waist Suspender Skirt Doll Clothes Pattern by Valspierssews

valspierssews


If you have been waiting for the high waist suspender skirt with the circle skirt then I am happy to announce that you can now purchase it in my Etsy Shop.

The two suspender skirt designs are very cute and very 50s looking. Especially if you add the vintage blouse with the piping.


There are two styles for the circle skirt. View 1 has the front cut on the fold and View 2 has a centre front seam and is cut on the bias. The skirt with the CF seam is perfect for plaids, checks and even stripes.


I did my bias cut version out of a light weight wool fabric to make a winter outfit. The bias cut makes it drape nicely. For the top I made a turtleneck from double knit ponte fabric using my Classic Knits pattern that will be out soon.


You won't find any knit patterns in the shop except the easy-t just yet because I am revamping the original 1801.  The original was a bargain but it was a bit over the top for inexperienced doll dressmakers. I got a bit carried away in the early days thinking that everyone could just throw together any option they liked from lots of pattern piece variations. 

Slight adjustment for light winter fabric

If you want to make a winter suspender skirt I explain in the high waist pattern that you will need to make just a slight sewing adjustment for the waist band. All you need to do it stitch each end of the waist band at 1/8" seam allowance but the top edge is still 1/4" seam allowance. This makes the waist band about 1/4" longer allowing for the thicker fabric in the skirt as well as the thicker fabric you may want to use for the sweater top. You will also need to adjust the back facing of the circle skirt down to 3/8" instead of the usual 1/2".


Because this design is simple as far as I am concerned it will go up at $4 AUD like the other simple suspender skirt design. My usual price is $5 AUD (about $3.70 USD) with the occasional more time consuming design up around $6 to $8 AUD.
You may find that each year I add a bit more as sales drop off on the earlier patterns and my skills improve for the later patterns but my aim is to provide top quality at a price I think is reasonable for an instant download.
I can't compete with the Joanne's sales on tissue patterns but I also think a pdf download that you can print out on sturdy printer paper and renew whenever it gets a bit rough, makes instant downloads better value.

I have lots of great instant downloads in my Etsy Shop.
Make sure you have a look around when you pop over the get your copy of 1883 High Waist Suspender Skirt.

Happy Sewing,
Val

Wednesday, July 18, 2018

Full Instructions for 1850/2050 Godette Skirt

Doll Clothes Pattern by Valspierssews

I had pretty much forgotten that the godette skirt only had basic instructions until a lady left a review to that affect. What! I thought. I had a look and sure enough my experiment with basic instructions was still up there.

I decided not to go in that direction and actually I have tried to make the instructions clearer in all my patterns by repeating the instructions for each view if there are more than just small differences. I figured it is easier just to choose a view then follow one set of instructions instead of having to refer to parts of another view.


So, I have written out full instructions for the godette skirt and put them into the listing on Etsy. If you already have the pattern I have contacted you with a link to the update.


You can buy this pattern in my Etsy shop

Happy Sewing,
Val

Thursday, June 21, 2018

Doll Clothes Circle Skirt Length Adjustment for 18" Dolls

Valspierssews


Creating your own custom designs is easy when you have some well fitting basic pattern pieces.

You can buy my pattern for the cute dirndle skirt with the shaped waist band and suspenders but you don't have to settle for just that design.

Valspierssews


I worked out that you can add a 1/2" to the depth of the waist band without affecting how it fits then combine it with the circle skirt from 1827 and you have a whole new look. It is easy to make a few adjustments to the length of the suspenders before you sew them on with the buttons.

I have started laying out my photo tutorials with the instructions written in the photo caption area. I noticed that when you convert it to a PDF to save or print out the photos tend to end up all over the place compared to the body text. However, the caption sticks to the photo.

The circle skirt for 1827 is a longer vintage length but it needs to be a bit shorter and cuter for the suspender skirt design.


Print out the 3 skirt pages for 1827. Make sure you make them 100%.

Cut them out and tape the sections together.

I liked the length of my dirndle skirt. It measured 5" so
I made the unfinished length 5 1/2" for my circle skirt.

Work around the skirt putting marks at the 5 1/2" length.

Make them close together enough so you can easily join them up.

Draw the cutting line by joining the marks.
Cut it off then do the other pattern piece. 

It is now ready to cut out for your pretty suspender skirt. Of course, you can always just make a regular skirt with a straight waist band and put a poodle applique on it.

My newsletter readers already have the custom designs pattern envelope to use for their custom designs. Just print it out and put it together then draw the new suspender skirt design on the doll outline. Pop in your new pattern pieces.

I haven't gotten around to putting a link to the custom envelope pieces in my blog but I will soon. Look out for it.

Some of my favourite customers have already made up the suspender skirt as in the pattern and with the wider waist band. I know some of them aren't keen to do much drafting so I will be publishing this wider waist band and short circle skirt in my shop soon. I just want to make a matching blouse pattern before it goes up. So look out for those too.

Happy Sewing,
Val

Saturday, May 19, 2018

Vintage Suspender Skirt Pattern for 18" Dolls

1882 Suspender skirt

Sometimes you just want to make something cute for your doll. This suspender skirt design is perfect for a 50s look. Team it with a blouse or a turtleneck or even a t-shirt.


It looks pretty simple to design but why bother designing your own when you can just buy the pattern already neatly drawn with clear instructions. You know when you make it up it will fit your 18" doll. It is designed to fit dolls similar to the American Girl Doll®.

No need to experiment.

These outfits are made by teaming the skirt with 1806 Open Neck Blouse View 1.


If you like to design you can try the circle skirt from 1827 on this waist band. Just put the skirt pieces together then trim off 1 1/2" from the hem edge.

Or you can just wait for the next suspender skirt that I am working on. It has a high waist and the short circle skirt.


Buy the gathered suspender skirt in my Etsy shop.

Happy Sewing,
Val

Tuesday, November 14, 2017

Photo Tutorial for the Pencil Skirt from 1805

doll clothes patterns by valspierssews
Great modern look
There are a couple of different ways to make the skirt from 1805.
I found that the gathered method was by far the easiest but I think the little pleats look the best.

Gathered Skirt
No need to mark the pleats but you do need to mark the back on the side of the placket with a pin.
Gather the front and back separately. You sew two gathering threads starting and finishing 1/2"  from each end. (I forgot to do the gathering threads before the side seam. I think I was worried about getting the seams mixed up like I did on the blue skirt.)

Cut out the skirt


Mark the back piece on the placket side. Stitch gathering threads on the back and the front.
Gathering Tip: Back stitch at one end for short lengths
Do a back stitch at one end because it is such a short length to gather. I always leave long tails at both ends for full gathered skirts.

Place the front on the back, right sides together. Stitch the unmarked side seam and overlock it.
I always mark the back if I need to know back from front.

Overlock the other side seam edges and the hem edge. Press up the 1/4" hem to crease it.

Stitch the unmarked seam and overlock the 3 raw edges

Pull up the gathering threads a bit ( to 6" front and back) so they roughly fit the waist band.

Pull up the gathering threads


Fitting Tip: Waist band length check
I found that the waist band was a bit too long for one of my dolls so I have decided to make sure the waist band fits the doll I am sewing for by folding it in half and placing it around her waist. The ends will overlap and I pin it in place. Depending on how you want to use the skirt and what fabric you are using you will make it tight or create some ease. If you want to tuck things into the skirt you will need some ease. If you are using a medium to heavy weight fabric you will need some ease. 
It always amazes me how much length you lose when you sew a seam and fold the garment along the seam line. The folding takes up an 1/8" to 1/4"  for thick fabrics.
The overlap needs to be a scant 1". Trim the end of the overlap so the overlap is 1".

Check the waist band is a good fit. Too much overlap
Trim the overlap back to 1 inch
Press under 1/4" along one long side of the waist band.

The back half of my waist band is 1/4" longer than the front half so to find the side seam mark I fold the waist band with 1/4" sticking out on the back half. Mark the side seam point on the waist band with a pin.

Find the centre of the waist band


Place the right side of the waist band against the wrong side of the skirt. Pin the side seam.
Pin the back of the skirt - marked with a pin - so the the waist band is 1/2" past the skirt. I extended mine 5/8" past because I am using quite a thick fabric.

The waist band extends 1/2" past the back edge

I'm not worried about the fit because I left some ease when I checked the length and this fabric is a knit so it gives a bit.

Fold in and finger press the side seam allowance on the skirt front, just at the waist edge. Pin the waist band on so it extends 1/4" past the skirt.

Fold in  seam allowance at the front and extend waist band 1/4" past

Pull up or let out the gathering threads so the skirt fits the waist band and knot the threads.

Gathering Tip: Knotting the thread tails
Tie two knots then swap hands with the thread tails and tie two more knots. This prevents slipping.

Even out the gathering across the skirt sections and add more pins.

Match the skirt to the waist band an tie off the threads.

Pinning Tip: Right angles to the seam or hem edge
I often start pinning on one side then turn the garment over to finish pinning and stitch. By pinning at right angles to the fabric edge I can always see my pins as I stitch.

Stitch the waist band seam. Trim it back slightly.
Fold the waist band back on itself, right sides together. Stitch across the ends with a 1/4" seam allowance.

This back part sticks out past the skirt edge after you have stitched it.

Trim the ends a bit. Don't cut too much off because it makes it harder to tuck it all inside the waistband when you sew.

The front part of the waist band is flush with the edge of the skirt.
Turn the band and press. If I was using this fabric again I would cut the waist band about 1/4" wider than the pattern. The thick fabric rolls rather than creases so the fold takes up nearly a 1/4" extra.

Push out the corners of the waist band and pin it in place along the stitching line of the waist band seam so it just covers it up. Stitch the waist band in place.

Stitch the placket side seam a bit more than halfway up from the hem edge. Turn the seam to the front and pin the placket closed. Come in from the waist band edge and stitch across the lower edge of the placket. Stitch the seam down on the front edge of the placket.

Side placket

With the skirt right side out. Turn up the hem and stitch it inside the skirt tunnel along the wrong side so you can see to catch the hem properly.

Add a velcro patch to the waist band. Hooks on the inside of the front and the loops on the outside of the back.

I have been crazy about buying shoes for a while now. They really make an outfit and the regular shoes are only 3 or 4 USD with free postage on Allie Express.

This one has the little flats. Looks like a high schooler.
This one has the lace ups and socks. Looks more like a middle schooler.
These shoes need a bit pf persuasion to get them on with socks.
A 5 yr old couldn't do it but a 10yr old could.
The little tie is just a strip of gross grain ribbon tied like a tie. The blouse is my open neck design 1806 View 1.

The skirt is the Bonus Pencil Skirt from 1805. That skirt in the photo is from 1817. Unfortunately 1817 is on the back burner until I get lots more motivation. One day.


The skirt is in this pattern
Hope I have inspired you to make more skirts. I think the gathered one looks best with this shirt rather than a T-shirt. The pleated one is nice for having the top tucked in.

Happy Sewing,
Val